Coast to Coast – Let’s Pack

We are in the final stretch folks – departure for the Coast to Coast Path in England is a month away (literally!).

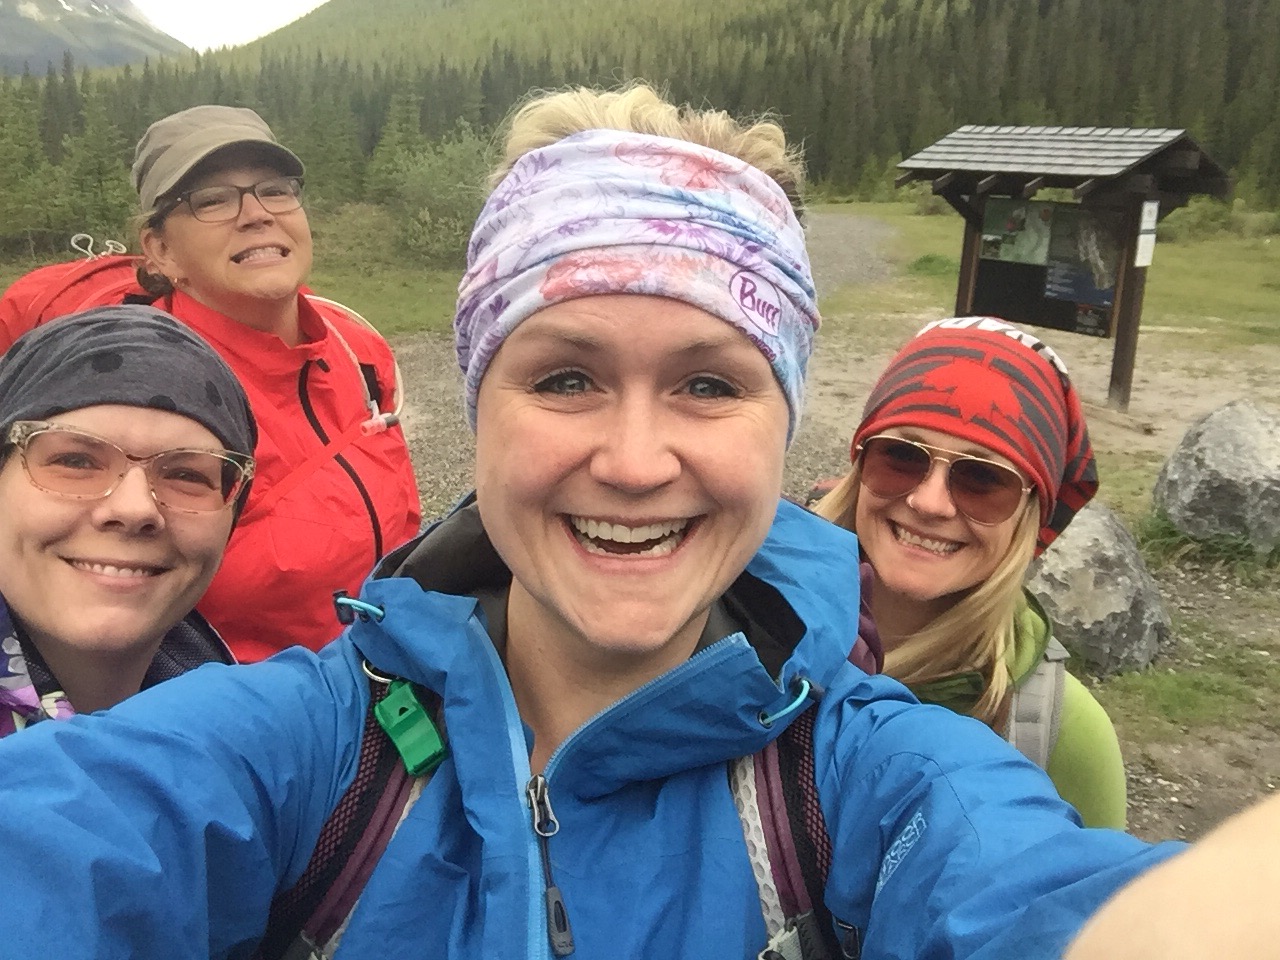
The Dad and Daughters crew have been hard at our training in and around each of our respective cities and provinces. At this point, we also need to add a focus on packing to our pre-departure regime. So let’s talk packing list!

A have posted a few blogs on packing that I recommend a read through – some ‘rules’, some ‘tips’ and some specific lists from my last trips. I just did a reread and they are all still super relevant so that makes me happy.

Specifically though for this Coast to Coast Path adventure, I am recommending the below specific list that takes into account the time of year, distances each day, activities other than the hike, and the mixed long distance path experience of the crew.

Let’s get to it…

Upper Half – Hiking

  • 2-3 Tech T-shirts and/or tank tops
  • 1 Tech Long Sleeve
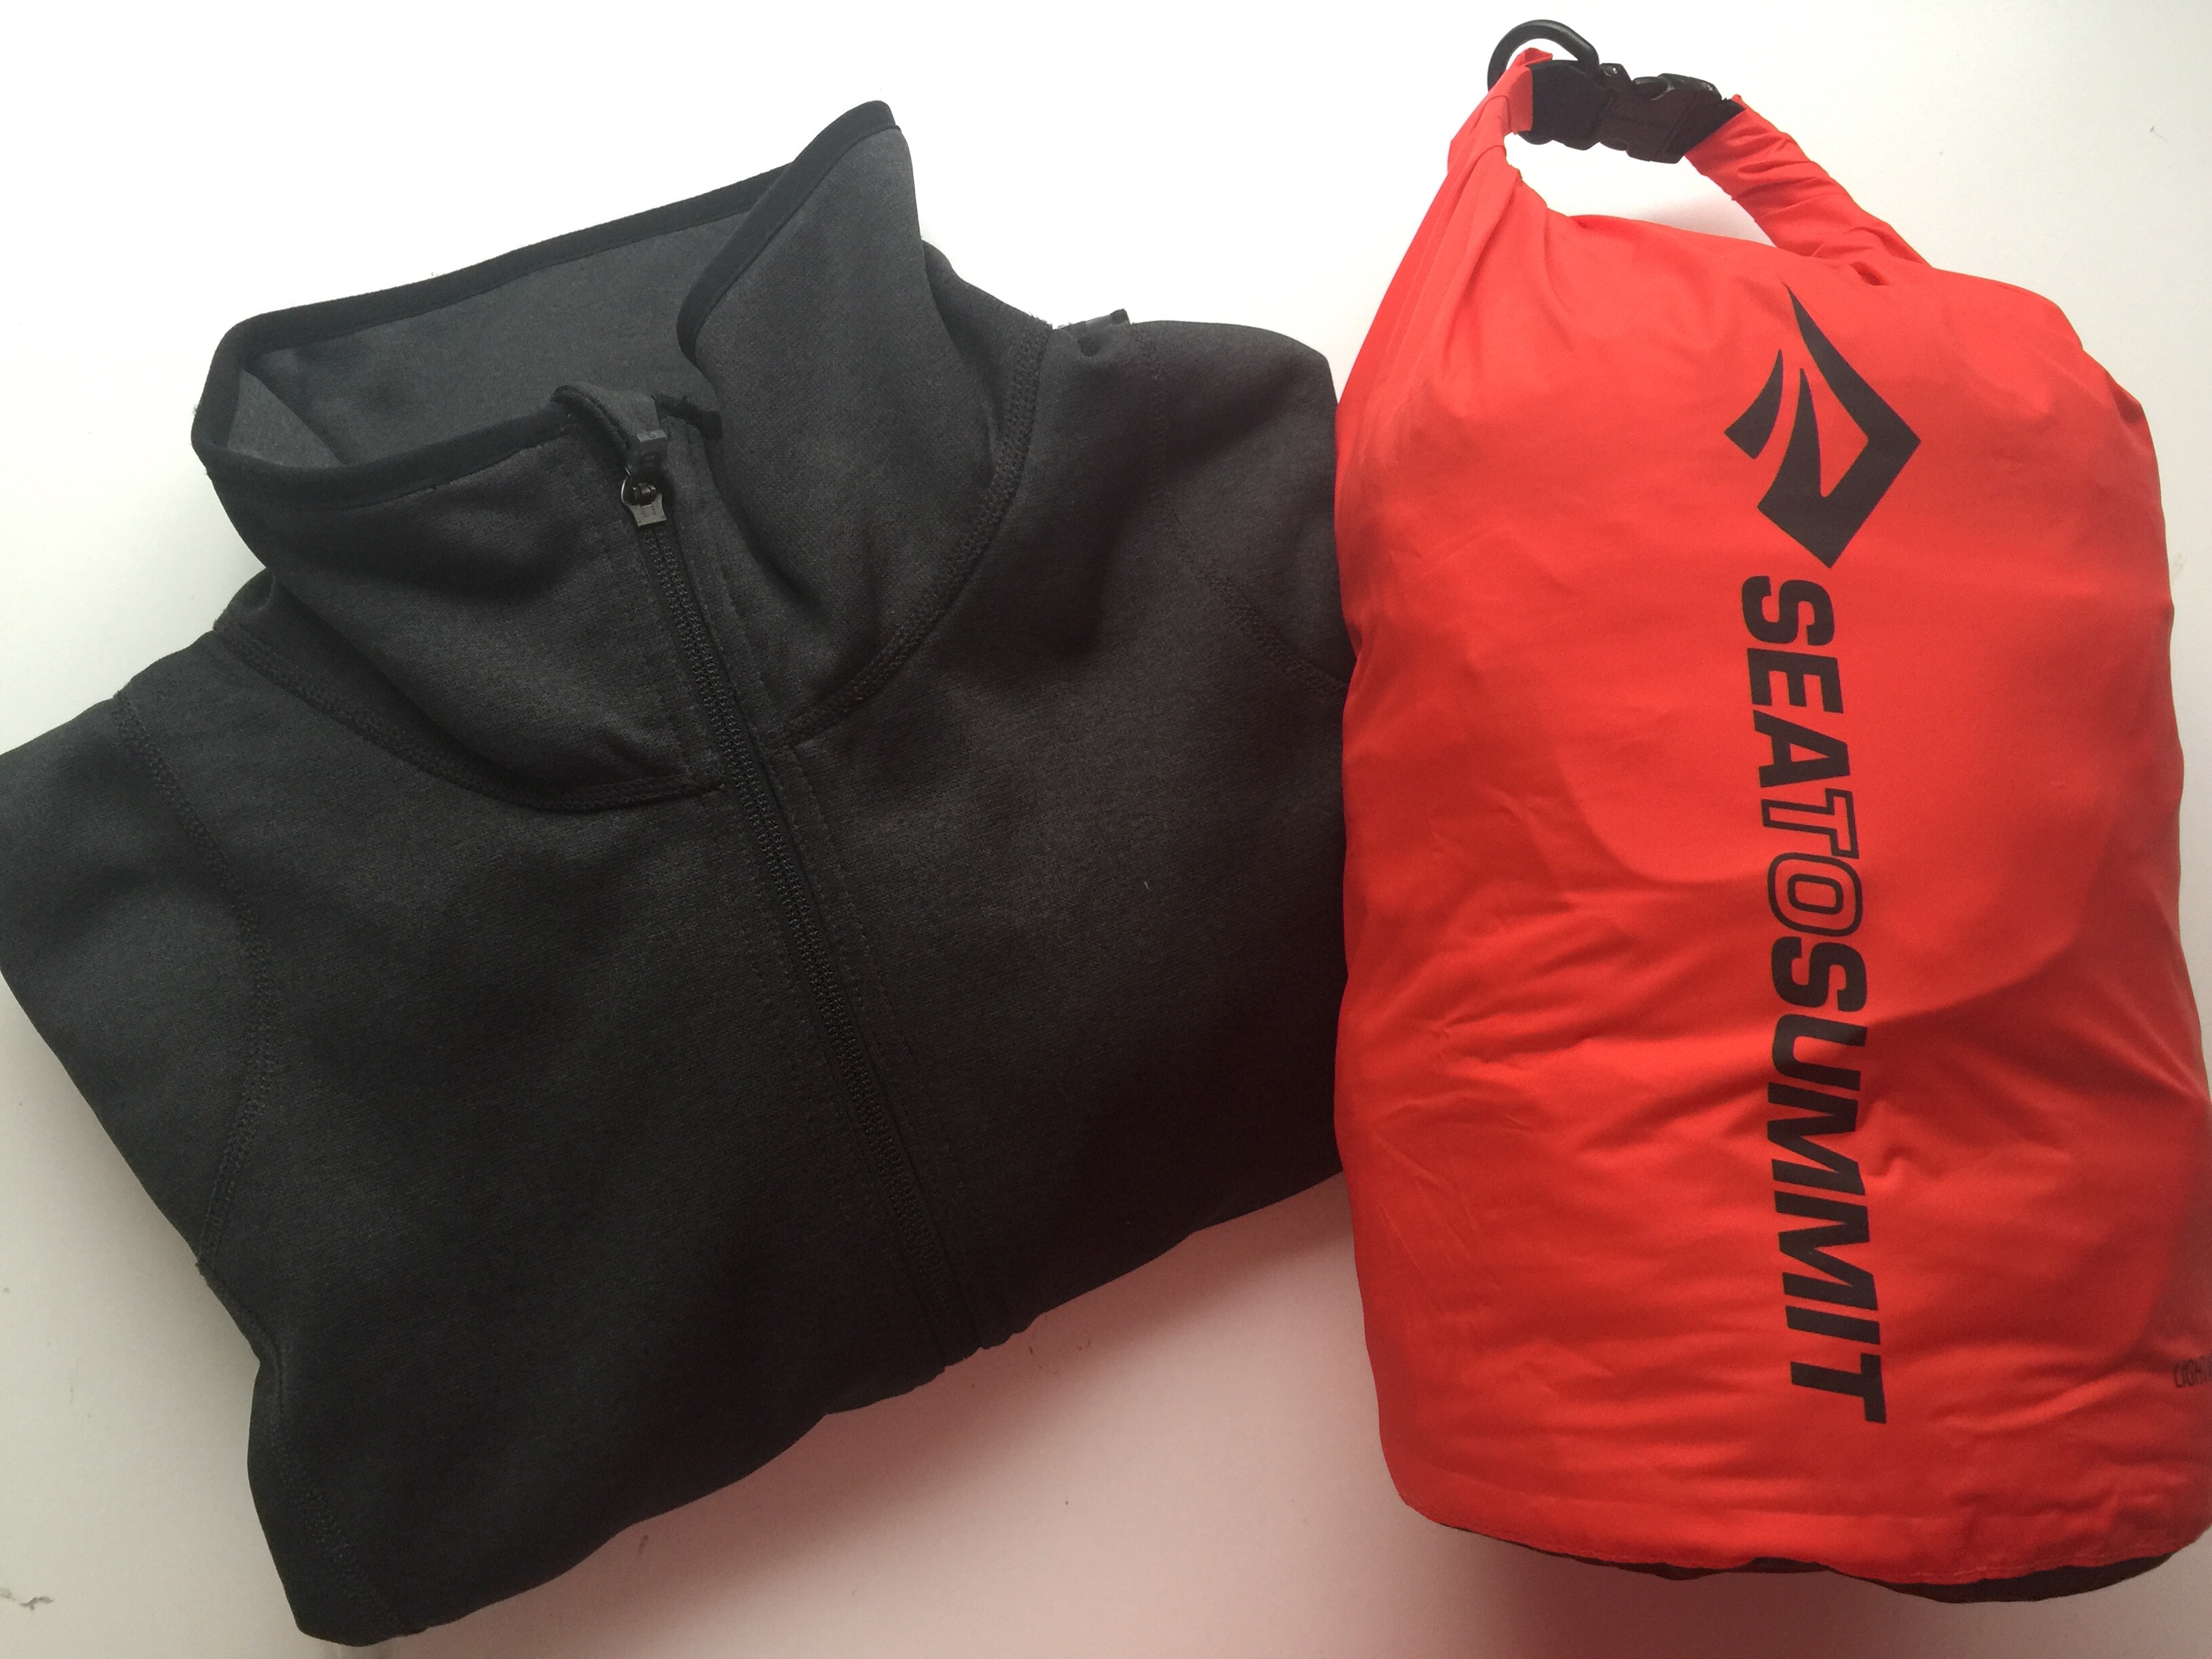
  • 1 Micro fleece or warm layer Long Sleeve or Zip Up (you will wear this on the plane, chilly evenings when not hiking and while on mid-day hiking breaks too)
  • optional Sun Shirt – I love an Eddie Bauer long sleeve button-up UV shirt. I love it as a thin layer in the evening and I love it on the plane. When hiking in the heat, I want very little sun exposure so wear it all day hiking on hot days. This blonde burns fast!

Lower Half – Hiking

  • 2-3 hiking bottoms (I do a short, a capri tight and full length hiking tights. If you have a zip off pant you can count that as a 2 in 1)

Under Bits

  • 3-4 undies (one for the day, a new pair for the night and spare)
  • 2 sports bras (ladies you will wear one of these when not hiking too and need more than one so you can wash them and they often don’t dry overnight. Wee ticks love tucking into sports bras so changing them out for a good wash gets rid of these jerks! And yes there will be ticks. Sorry)
  • Pajamas

Pack all the above in 1-2 compression or stuff sacks! Think of them like drawers that squish.

Outer Hiking Bits

  • Hiking Poles
  • Rain jacket
  • Rain pants
  • Toque – all have an amazing bamboo toque from Wild & Raven we will be showing off this trip. The best!
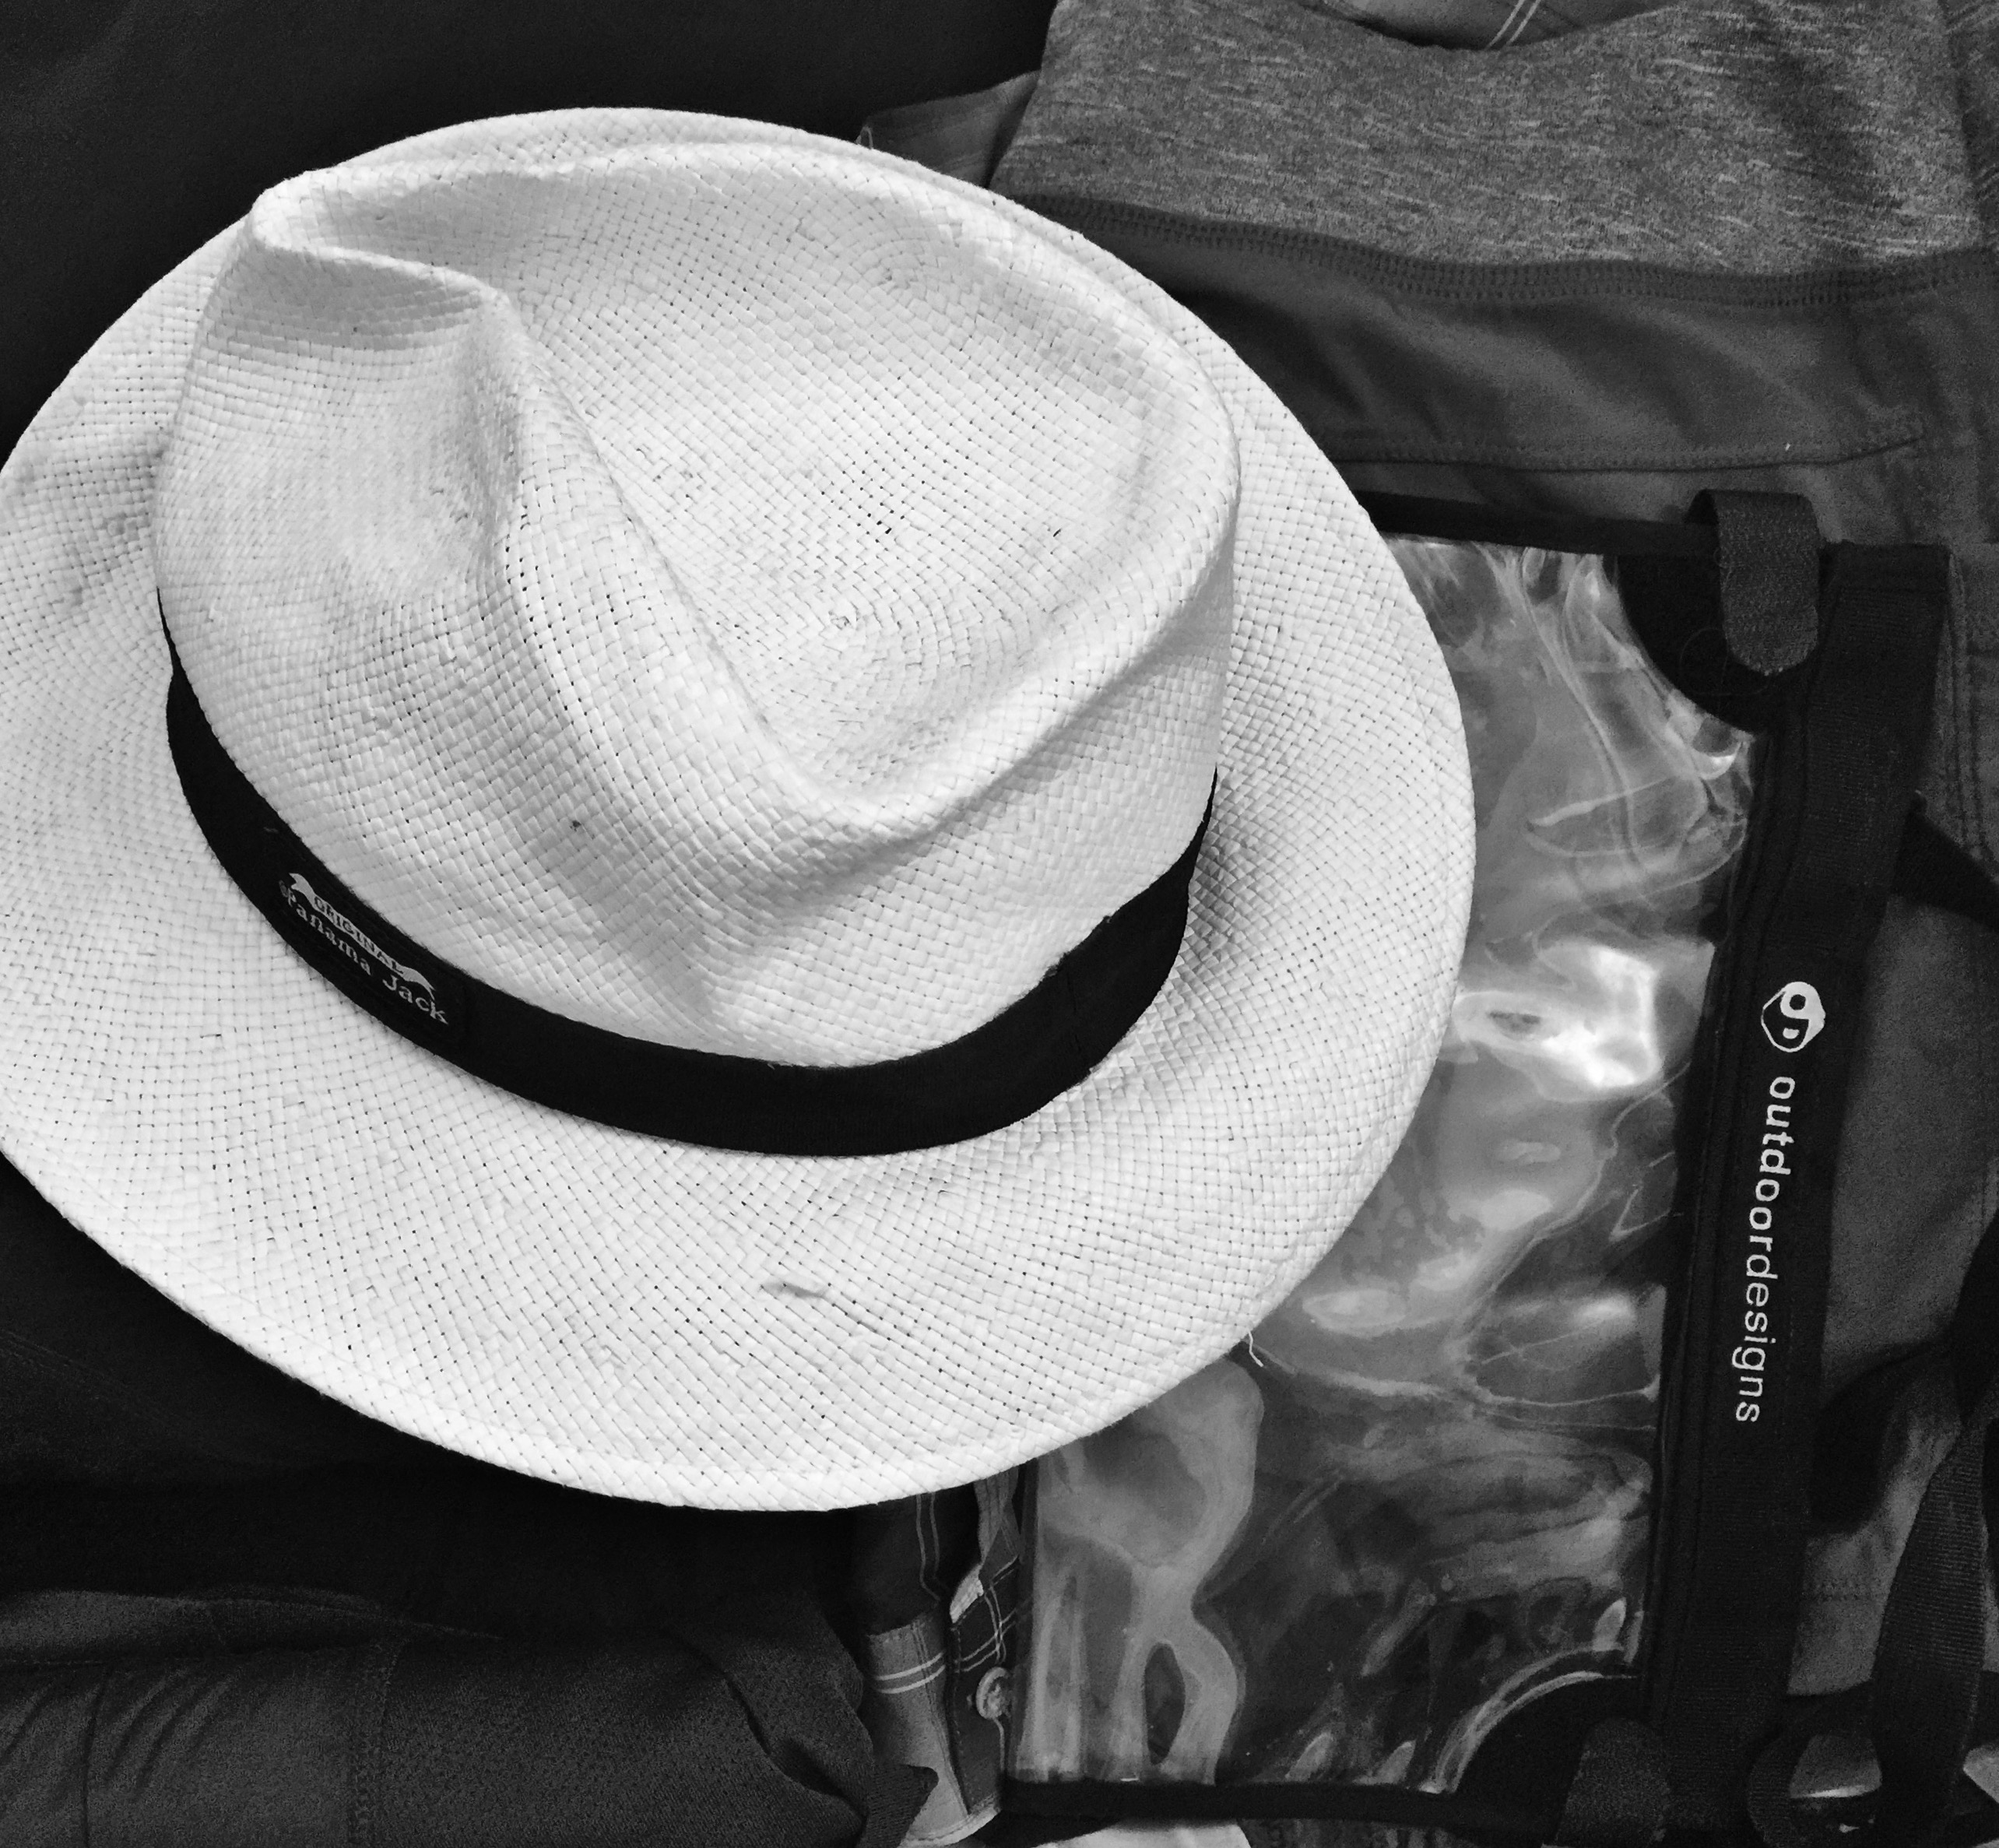
  • Hat (for sun but also works for rain, especially for the crew wearing prescription glasses)
  • optional 2 Buffs – good for your head, on your arm for sweat and runny nose, a sling, thigh chafe cover, a carry sack, etc!

Pack your rain gear in a compression sack. This will be in your pack everyday – if the weather spirits love us, you will never use it.

Foot Bits

  • Hiking boots or trail shoes – the ones you will wear every day, every km on trail
  • optional runners – if you have room, changing to a light weight runner on long stretches of road walking (or when being a tourist) feels dreamy! Like clouds!
  • Gaiters – soft short pair for every day to avoid bits in your boots, a optional second tall waterproof pair for the Moors and rainy days
  • Sandals – for the evening, your toes will thank you for the fresh air
  • 4 hiking socks (or combo if you use liners) – you will need 2 socks a day so you can switch-out midday.
  • optional Knee length compression socks – but hugely recommended. I wear them on the plane, in the evening and even overnight if my dogs are barking, and in a heat wave while I hike. My feet love to get their ‘swell on’ once in a while, these socks keep em contained and they help with cramps and recovery

In Your Hiking Pack

  • Hiking Pack (20L to max 35L)
  • Rain cover for Pack (might be built in)
  • Water bladder 3L
  • First Aid Kit (see list below)
  • Carabiner
  • Phone (and camera), optional power pack and cords, optional headphones – all in a waterproof ziplock or case
  • Small bug spray with deer (horseflies!)
  • Sun screen for face and body
  • Lip chap with SPF
  • Trail guide and map – not all of us need to carry these but we should have a couple between us for when we split on low and high route options.
  • Kleenex / Toilet paper (and ziplock to pack out)
  • Small hand sanitizer
  • Your lunch and snacks as applicable
  • Candy (mmm Coke Bottles and Sour Soothers are my recommendation!)
  • Wallet and some small cash (for honesty boxes or wee stops that don’t take card)

I like to put ‘like’ items in a little case – sunscreen, lip chap, Kleenex, sanitizer etc so it’s easier to find. I also bring a cute little zippy case for snacks. Over the days you will cumulate a little variety of half eaten cookie and candy packages from the shops – these keeps them and their crumbs contained. This is called the Happy Zippy!

You will find what works for you between the pockets in your backpack. My best recommendation is to put things back where you found them! If your pocket on left hip is for lip chap, sour soothers and hand sanitizer then don’t go putting your lip chap in the right pocket.

Plane, Train, Evening & Tourist

Basically all the activities you will do when not hiking. This is wear a little cotton next to the skin when you have been head to toe in tech gear can feel like a dream!

  • Plane / Train / Tourist light pack that can be squished really small to go into or hooked to your larger backpack when we travel about – I have a Osprey Ultralight Stuff Sack Backpack that can be stuffed into its own pocket that I swear by. No I do not work for Osprey – yes I am available if they want me too 😉
  • Plane / Train / Tourist outfit that you will also wear each night at the pub post hike and shower. Think simple, think small to pack but also comfy and photo worthy. I do a cotton pants tight black and cotton tank. Then use my hiking fleece or sun shirt or tech long sleeve to layer up.

Random Must Have Bits

A brain dump of the extra things I bring along that I feel are essential and are relevant to all the activities you will do.

  • UK plug or adapter
  • Tech charger leads/cords that work with the UK plug or adapter
  • Headphones
  • Light weigh water bottle – think the weight and size of a Smart Water Bottle. You need to stay hydrated so this is your plane, train, evening, tourists ‘always with you’ bottle AND suggest you also take it on the hike each day with some electrolytes. Your bladder is water only.

Toiletries

These are super personal but happy to share my list if it’s helpful. I will say you use less than you think and if visiting a country like England you can buy what you run out of or forget. Finally, everyone is prettier on vacation – relaxed and happy is beautiful – so take less or even more makeup. Don’t stress!

  • Brush or comb
  • Small shampoo (and conditioner)
  • Brush or comb
  • 1/2 bar soap (in a waterproof bag / case)
  • Deodorant*
  • Body cream
  • Face Cream
  • Razor
  • Tweezer (remember ticks!)
  • Prescriptions*
  • Toothbrush, toothpaste and floss*
  • Q-tips
  • Nail clippers
  • Tiny stinky bathroom smell spray
  • Meds Rescue – a little sample of the meds you might need if feeling unwell. I bring a single little blister pack (and take a photo of the instructions) of the following: Pepto, Imodium, Gravol, day Sinus or Allergy, night Sinus or Allergy, a few throat drops, Advil and Tylenol.
  • optional hair spray
  • optional dry shampoo
  • optional hair elastics
  • Minimal make up*
  • Perfume sample*

Anything with a * I bring on the plane with me in the above-mentioned stuff sack backpack – with 20hrs of travel ahead of us, these help me feel human. For sure your prescription meds must be carried on with you!

All of this is packed in a little toiletries bag!

Extra’s I Swear By

  • Sunglasses
  • A few laundry sheets or soap
  • Silk sleep sack – they often only have a comforter in the BnBs and I am a sheet gal so bring my own!
  • An extra, empty compression of stuff sack of about 8L or 10L for your dirty laundry. Keep that stink contained 😉
  • Ziplocks – a couple medium sized one and a bunch of sandwich size for snacks when the bag breaks, wet socks, exploded sunscreen, etc.
  • Electrolytes! Nuun is my go to. I like the ones with caffeinee for a wee boost during my hike and without caffeine in the evening to help recovery. I use that lightweight water bottle mentioned above for my Nuuny-juice!
  • Sleep mask (for the plane and each night. The sun is up at 5am and black out curtains are not a thing in English BnBs)
  • Ear plugs
  • Copy of your passport and your itinerary – and leave a copy of each at home with a loved one!

First Aid in Your Hiking Pack

  • Headlamp or small torch with batteries
  • Emergency blanket
  • Blister treatment – I swear by and only use UK sourced Compeeds but do what works for you! Blister bandaid, Leuko tape, wool, etc.
  • Individual wrapped Alcohol swabs – before you do anything first aid-like swab those hands and the treatment site!
  • Safety pins (a few) or needle and thread – the little travel sewing kits are a dream
  • Bug bite relief
  • Polysporin or equivalent
  • Whistle (may be built into your pack strap, I know Osprey has a whistle strap)
  • Tweezers (from your toiletries bag)
  • Emergency electrolytes or sport beans
  • Bandaids
  • Prescription rescue meds – inhaler, epinephrine, etc. If you have these make sure you fellow hikers know where to find them and when you need them. Put them in an obvious outer pocket on your pack too!
  • Medical tape
  • Tensor bandage
  • Lighter
  • Duct tape – wrap a whole bunch around the lighter instead of trying to being a roll
  • optional Saline Tubes
  • optional Iodine Soaked Pads
  • optional Tegaderm Dressings

The optional items may be better suited to treating blisters and skin abrasion off the trail so you don’t need to carry them in your hiking pack. Also work with the crew you are hiking with to share the load on these items where it makes sense.

Well that’s it – wow that feels like a lot but at almost 2000km of long distance path hiking I feel like it’s a solid list for newbies and a good place to play with for the non-amateurs.

One final MOST SUPER IMPORTANT TIP

Packing tends to be one of the most stressful steps for people. I can see that. It’s not the actual packing – it’s about all the many, many, many micro decisions you have to make that can be exhausting. In a world where we are all sitting on the edge of decision fatigue, packing can break the bank. Try this:

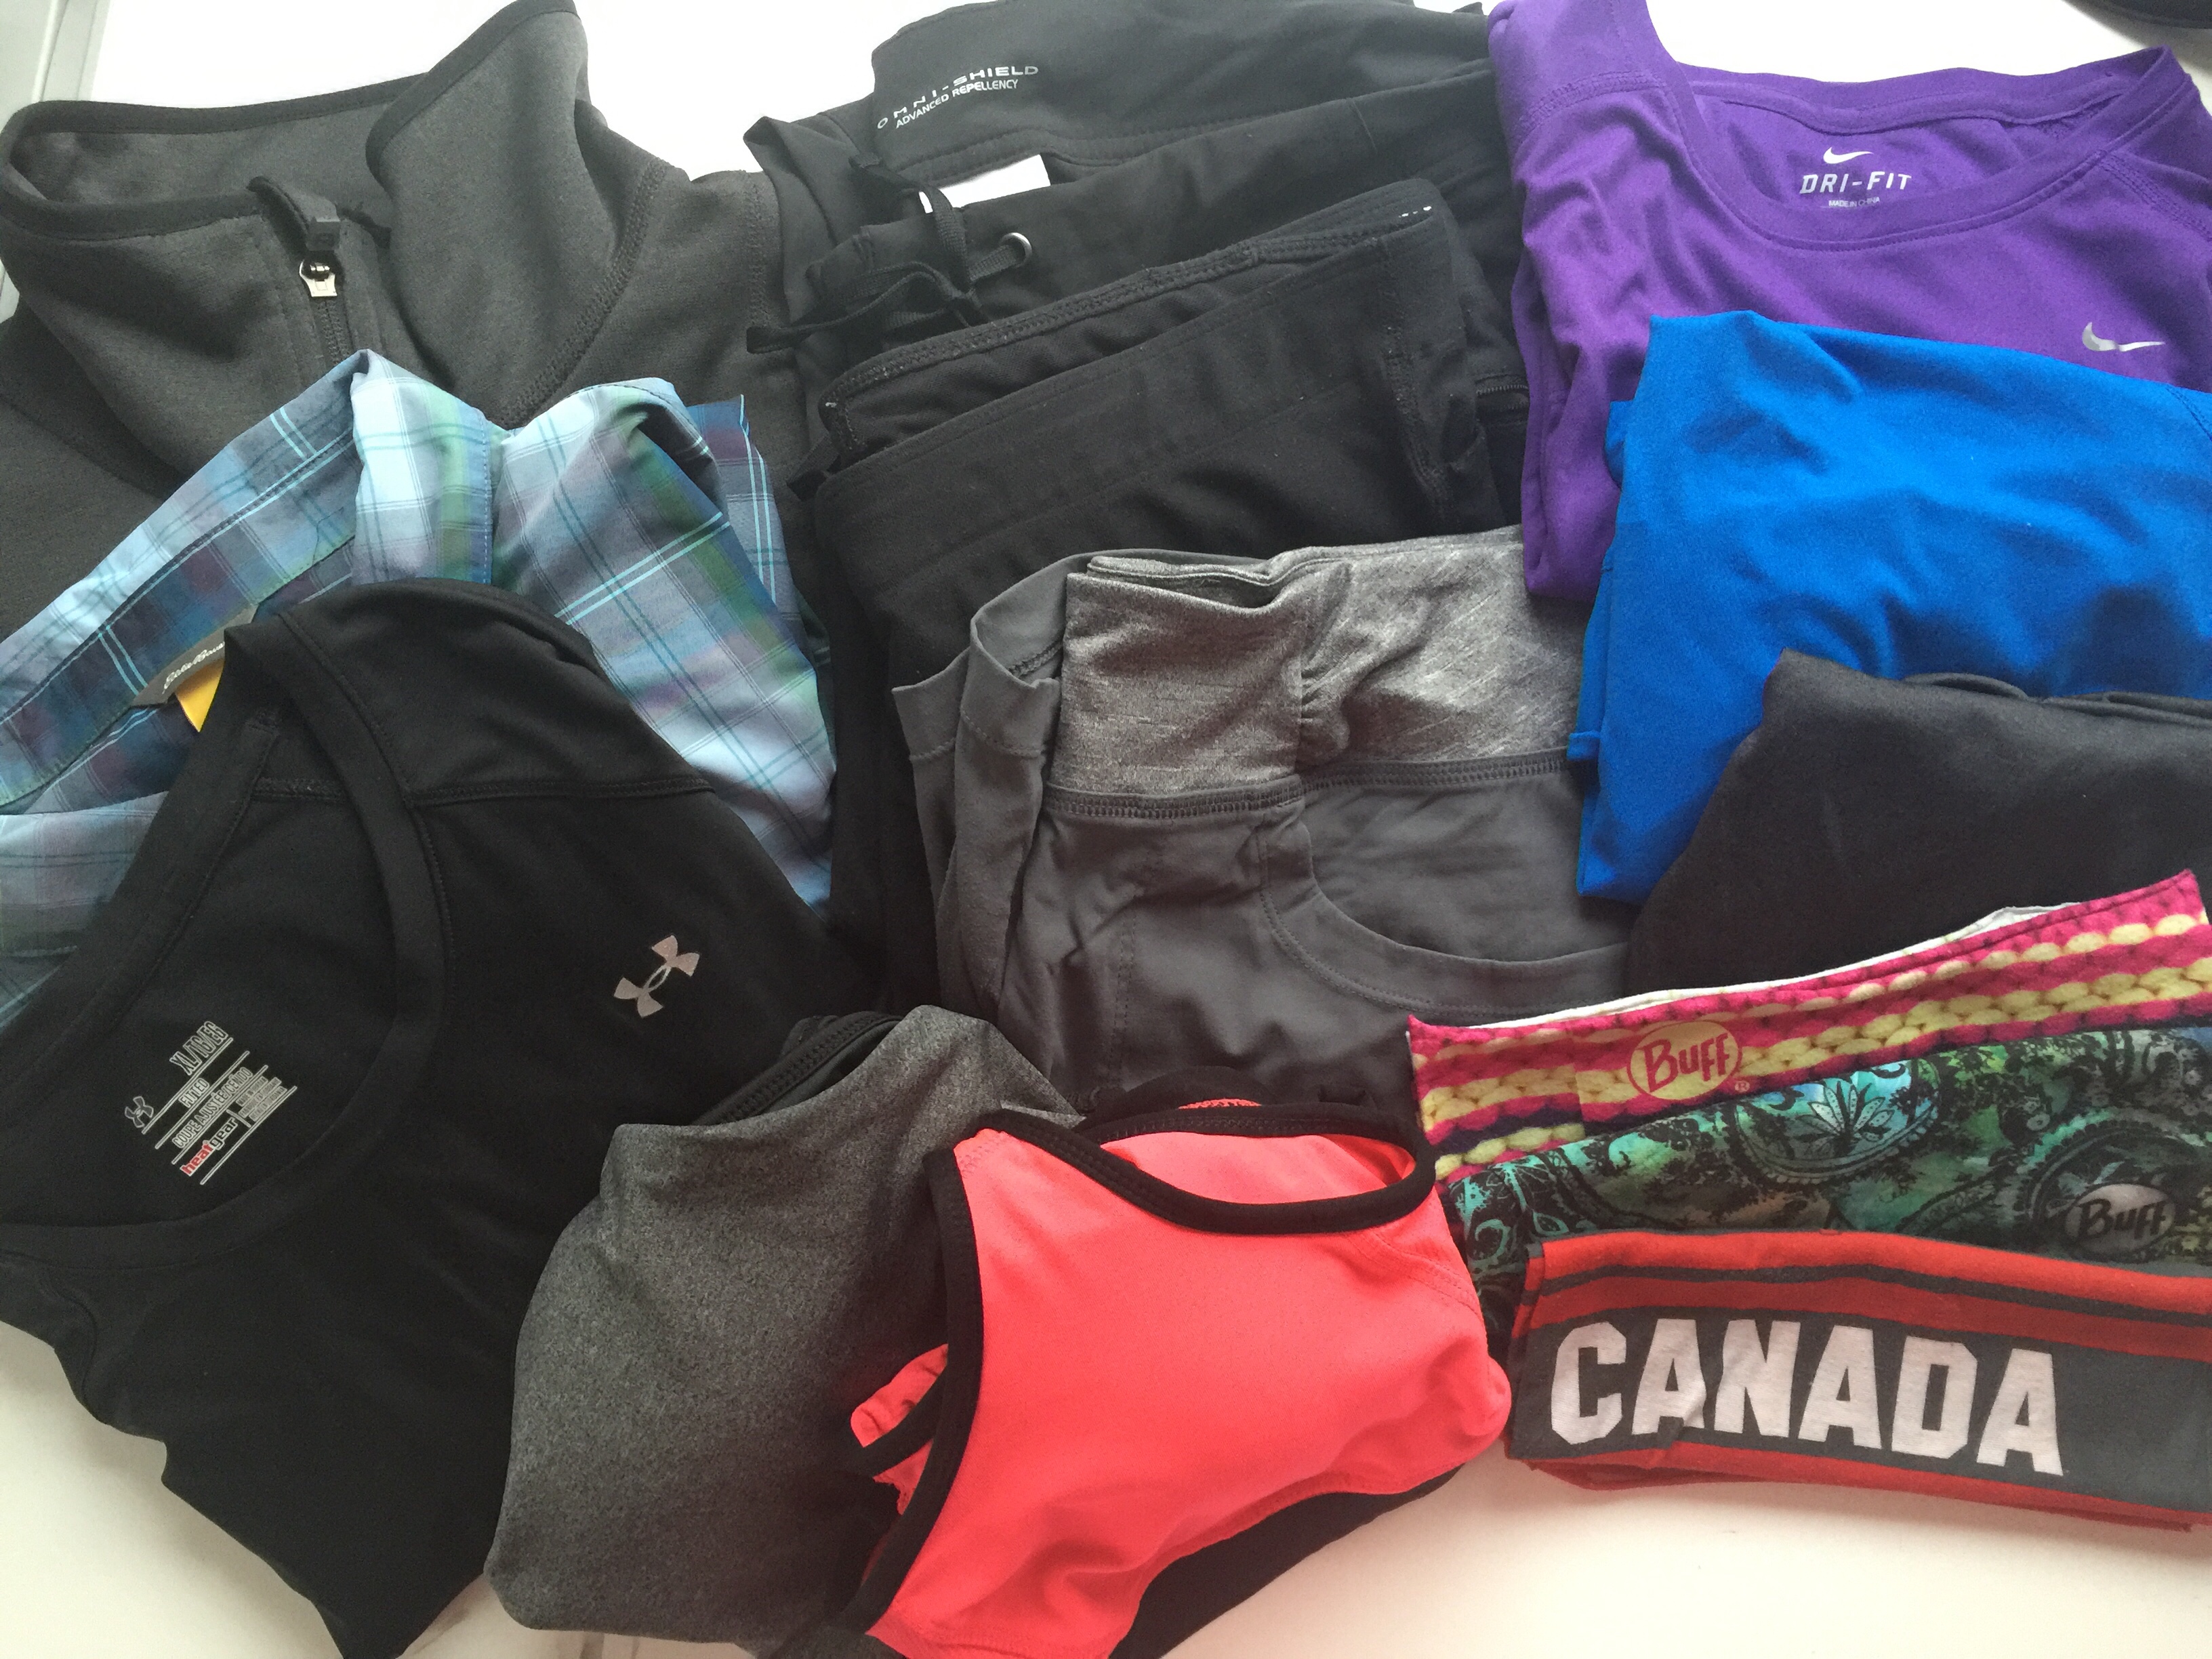
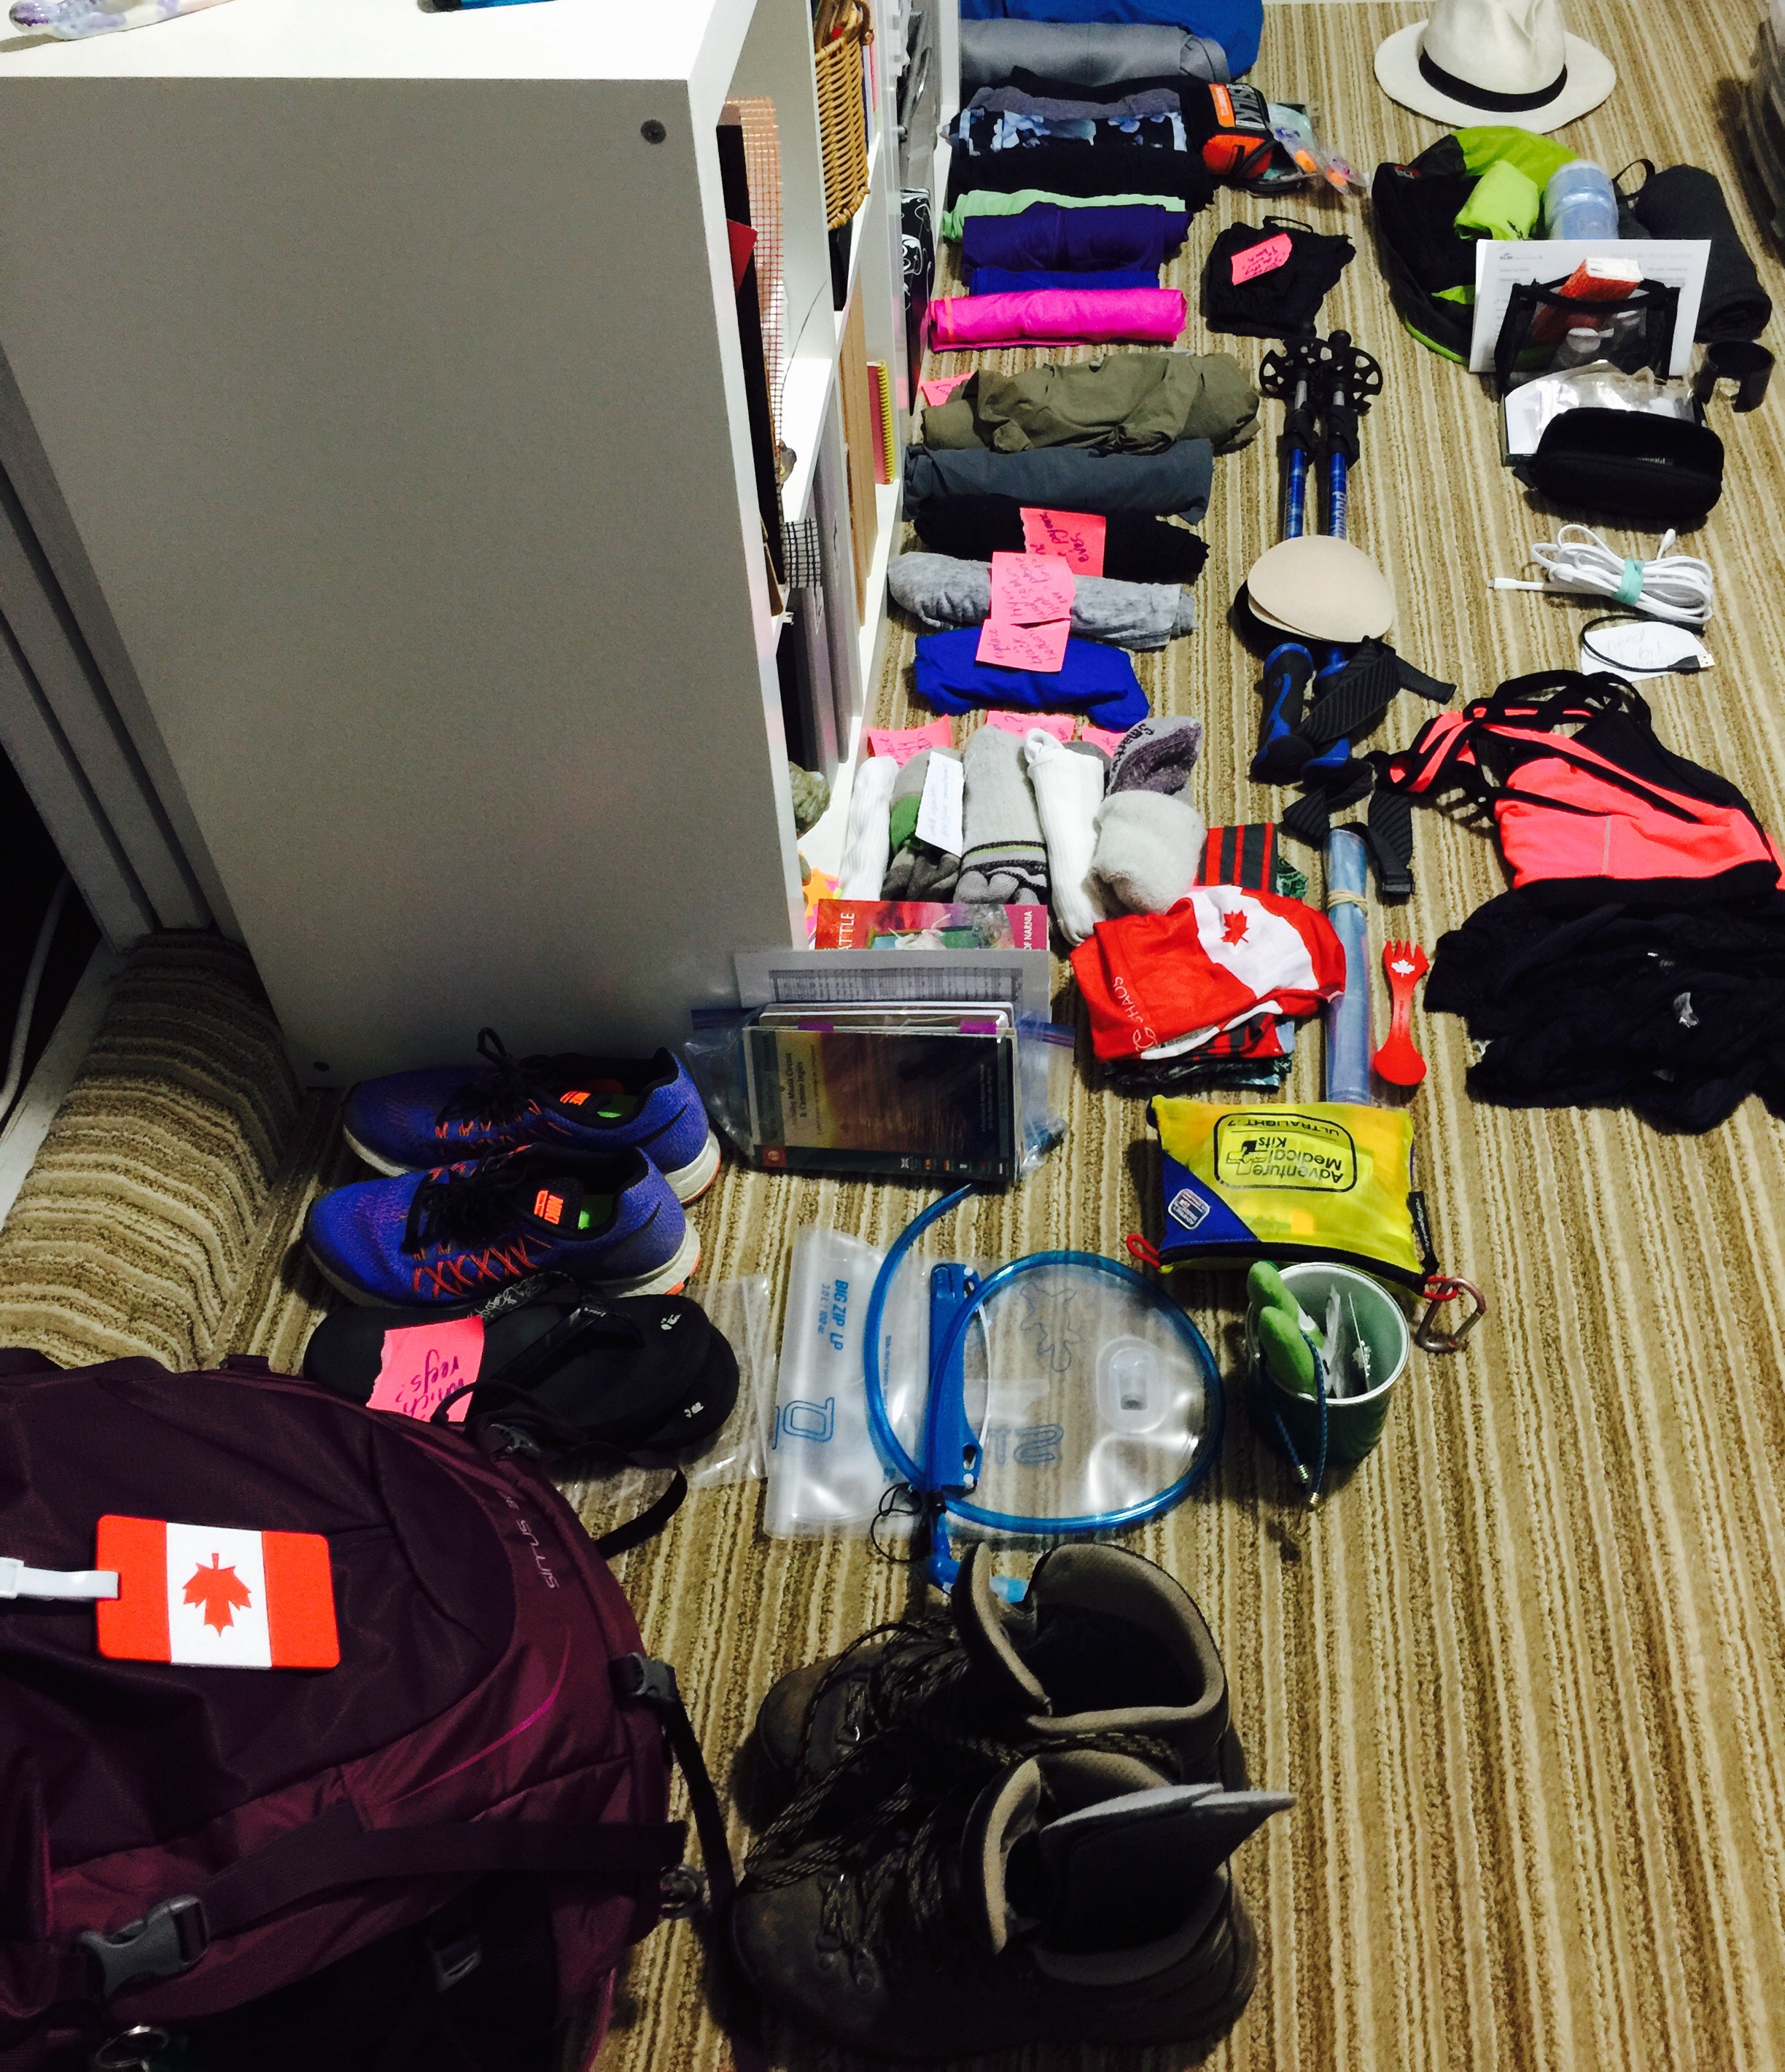
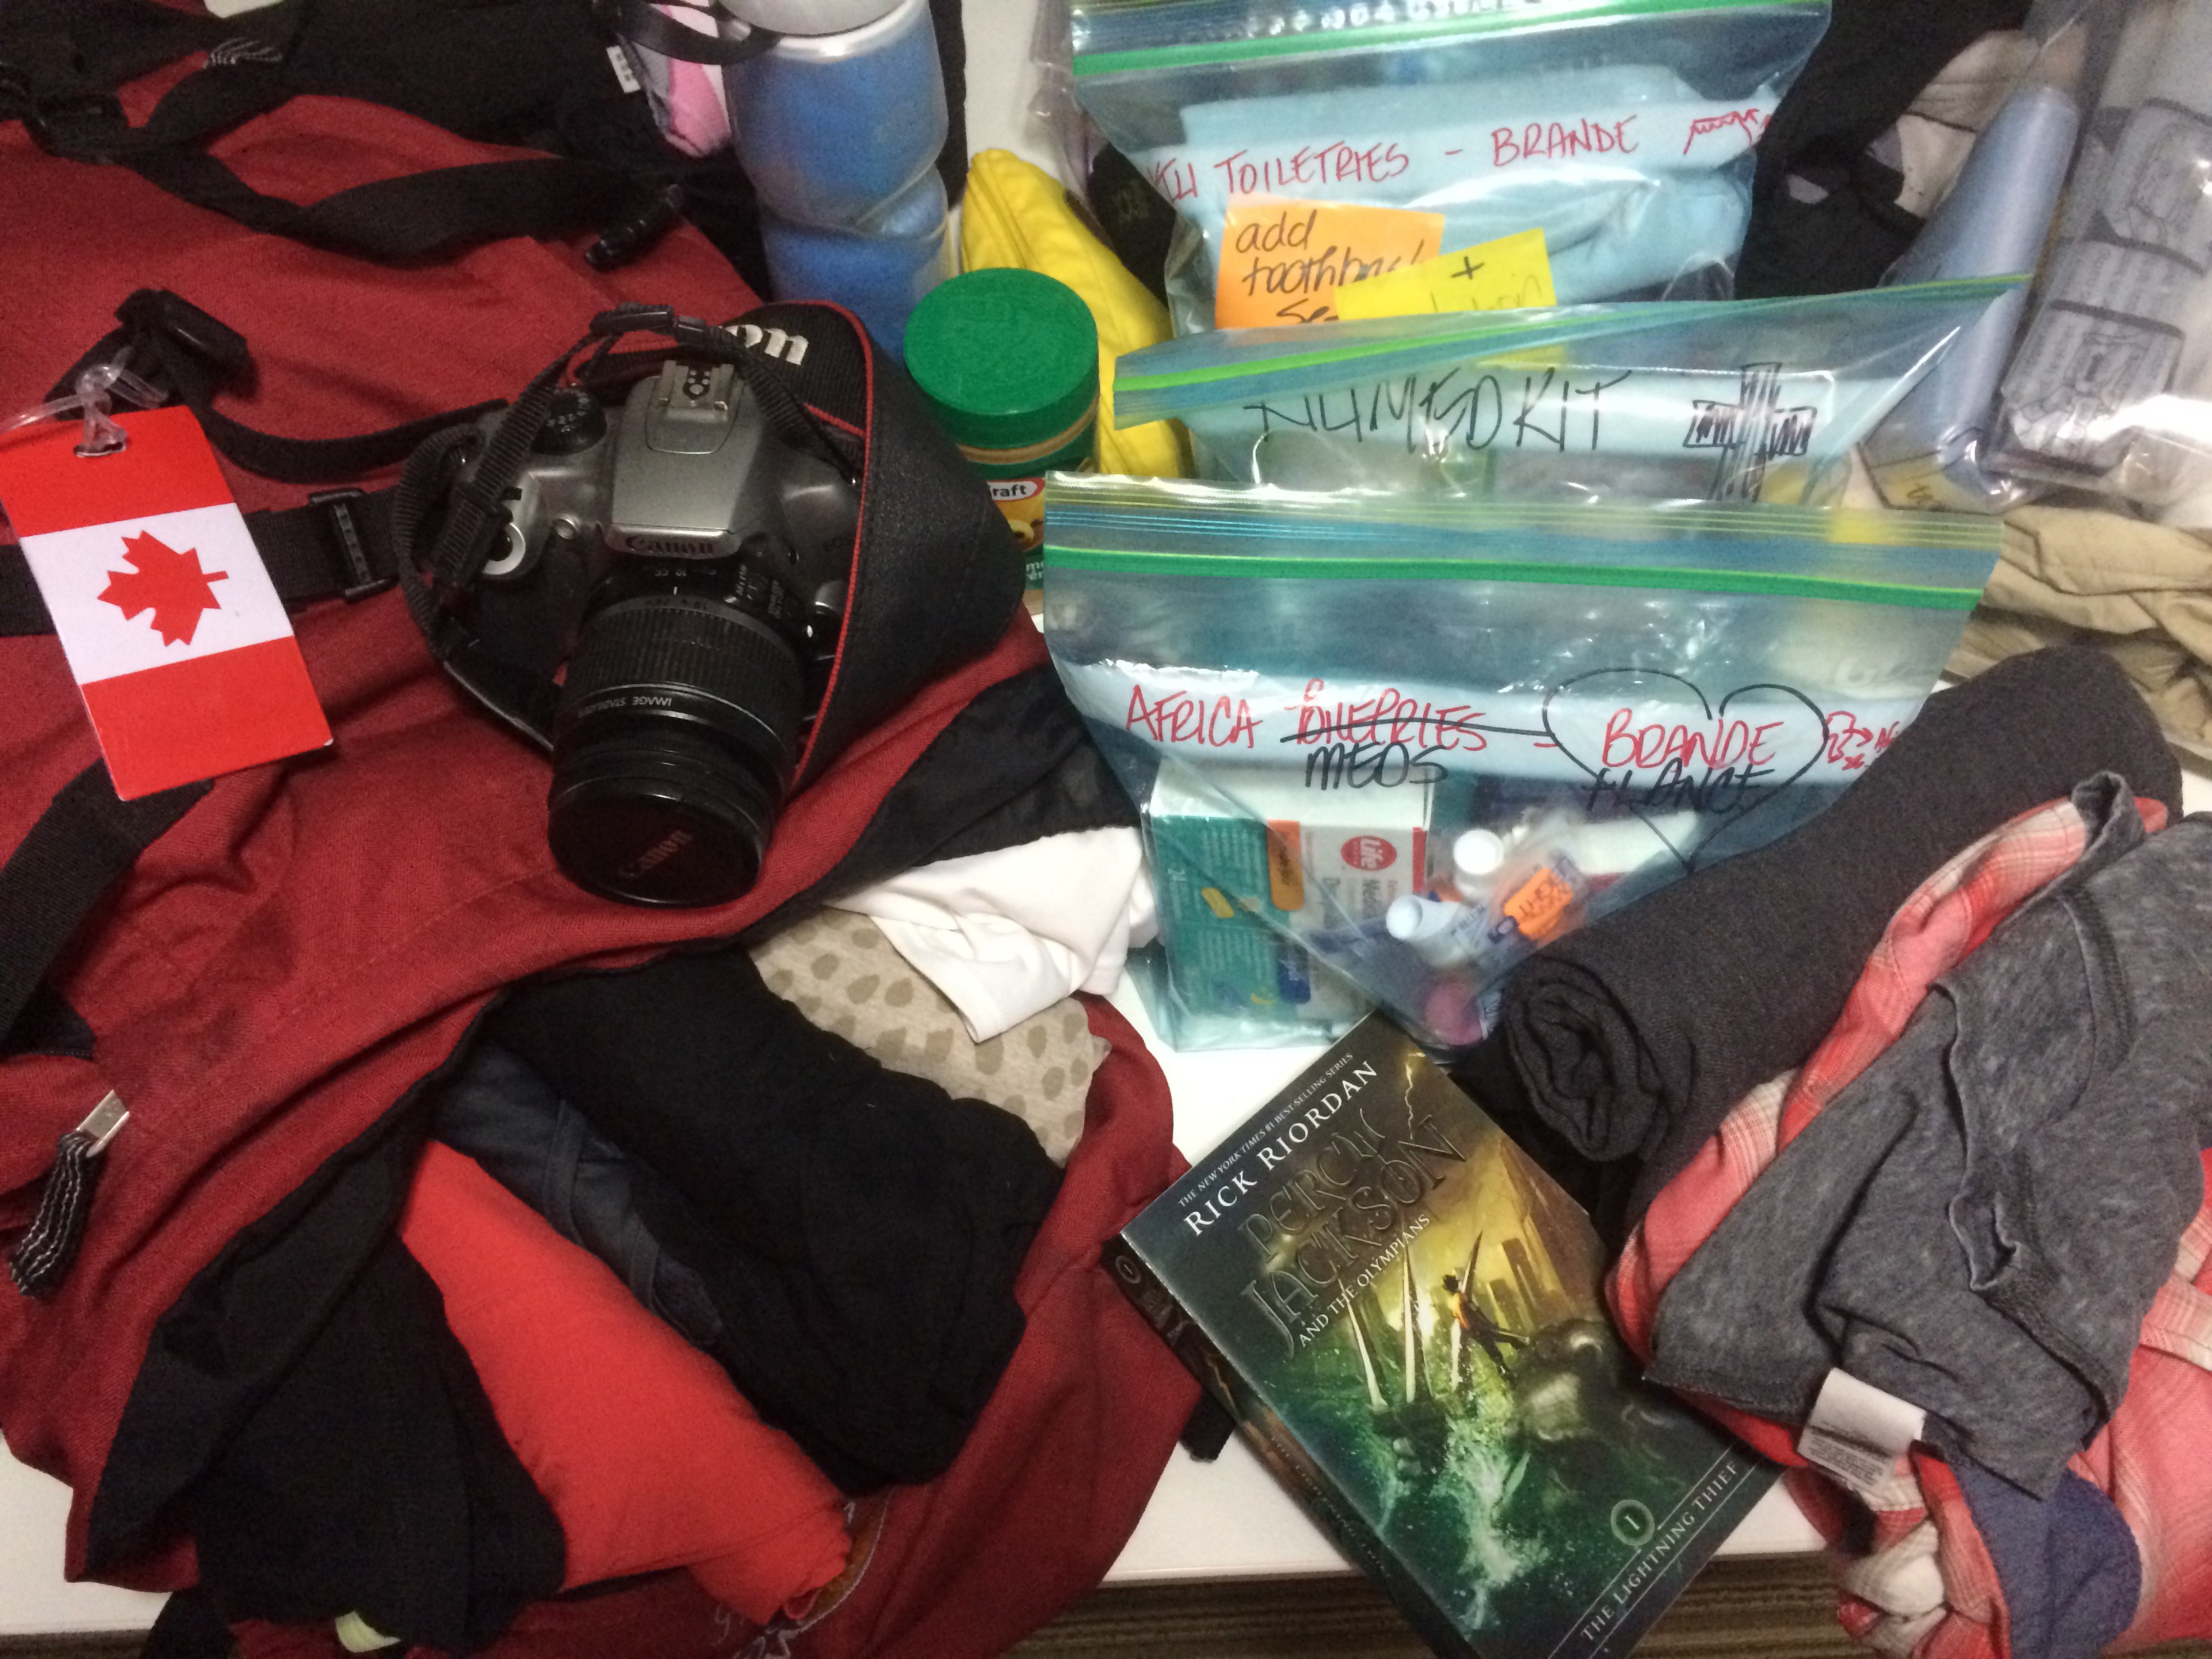
  1. Set aside a place where you can put your to-be-packed items as you collect, buy and decide on them. I literally get dressed for my training hikes from this pile and then put them back when washed.
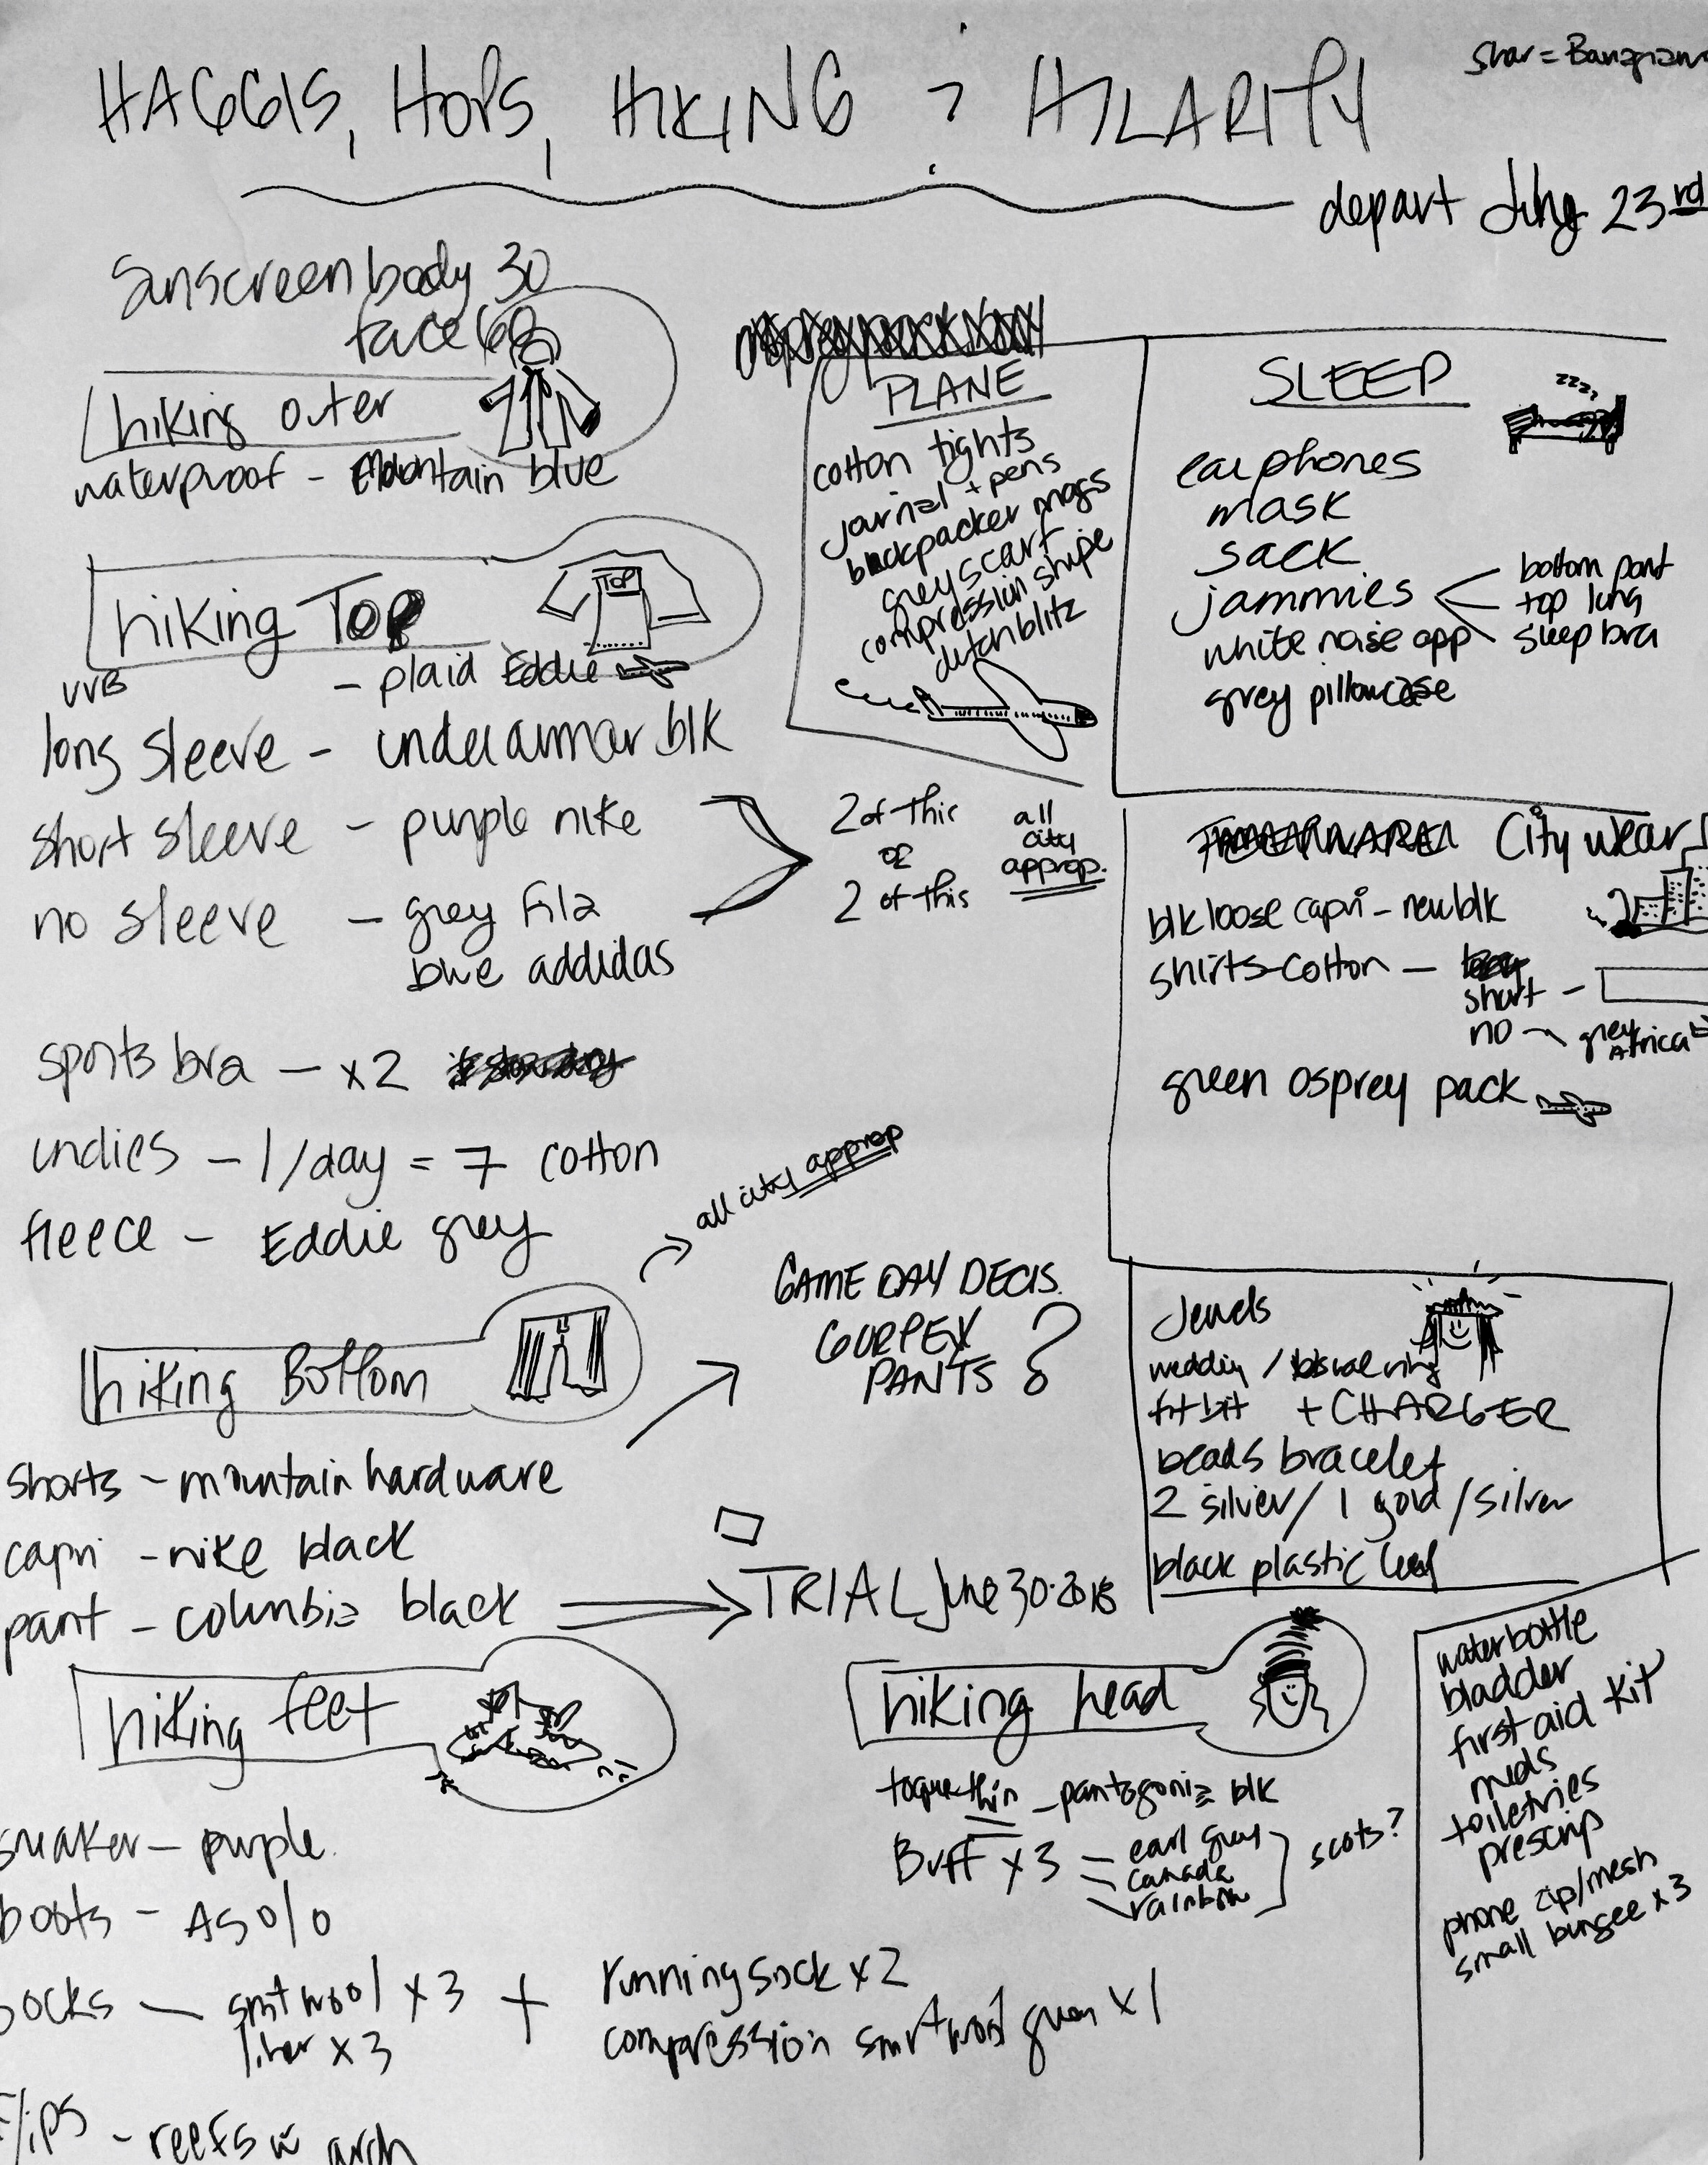
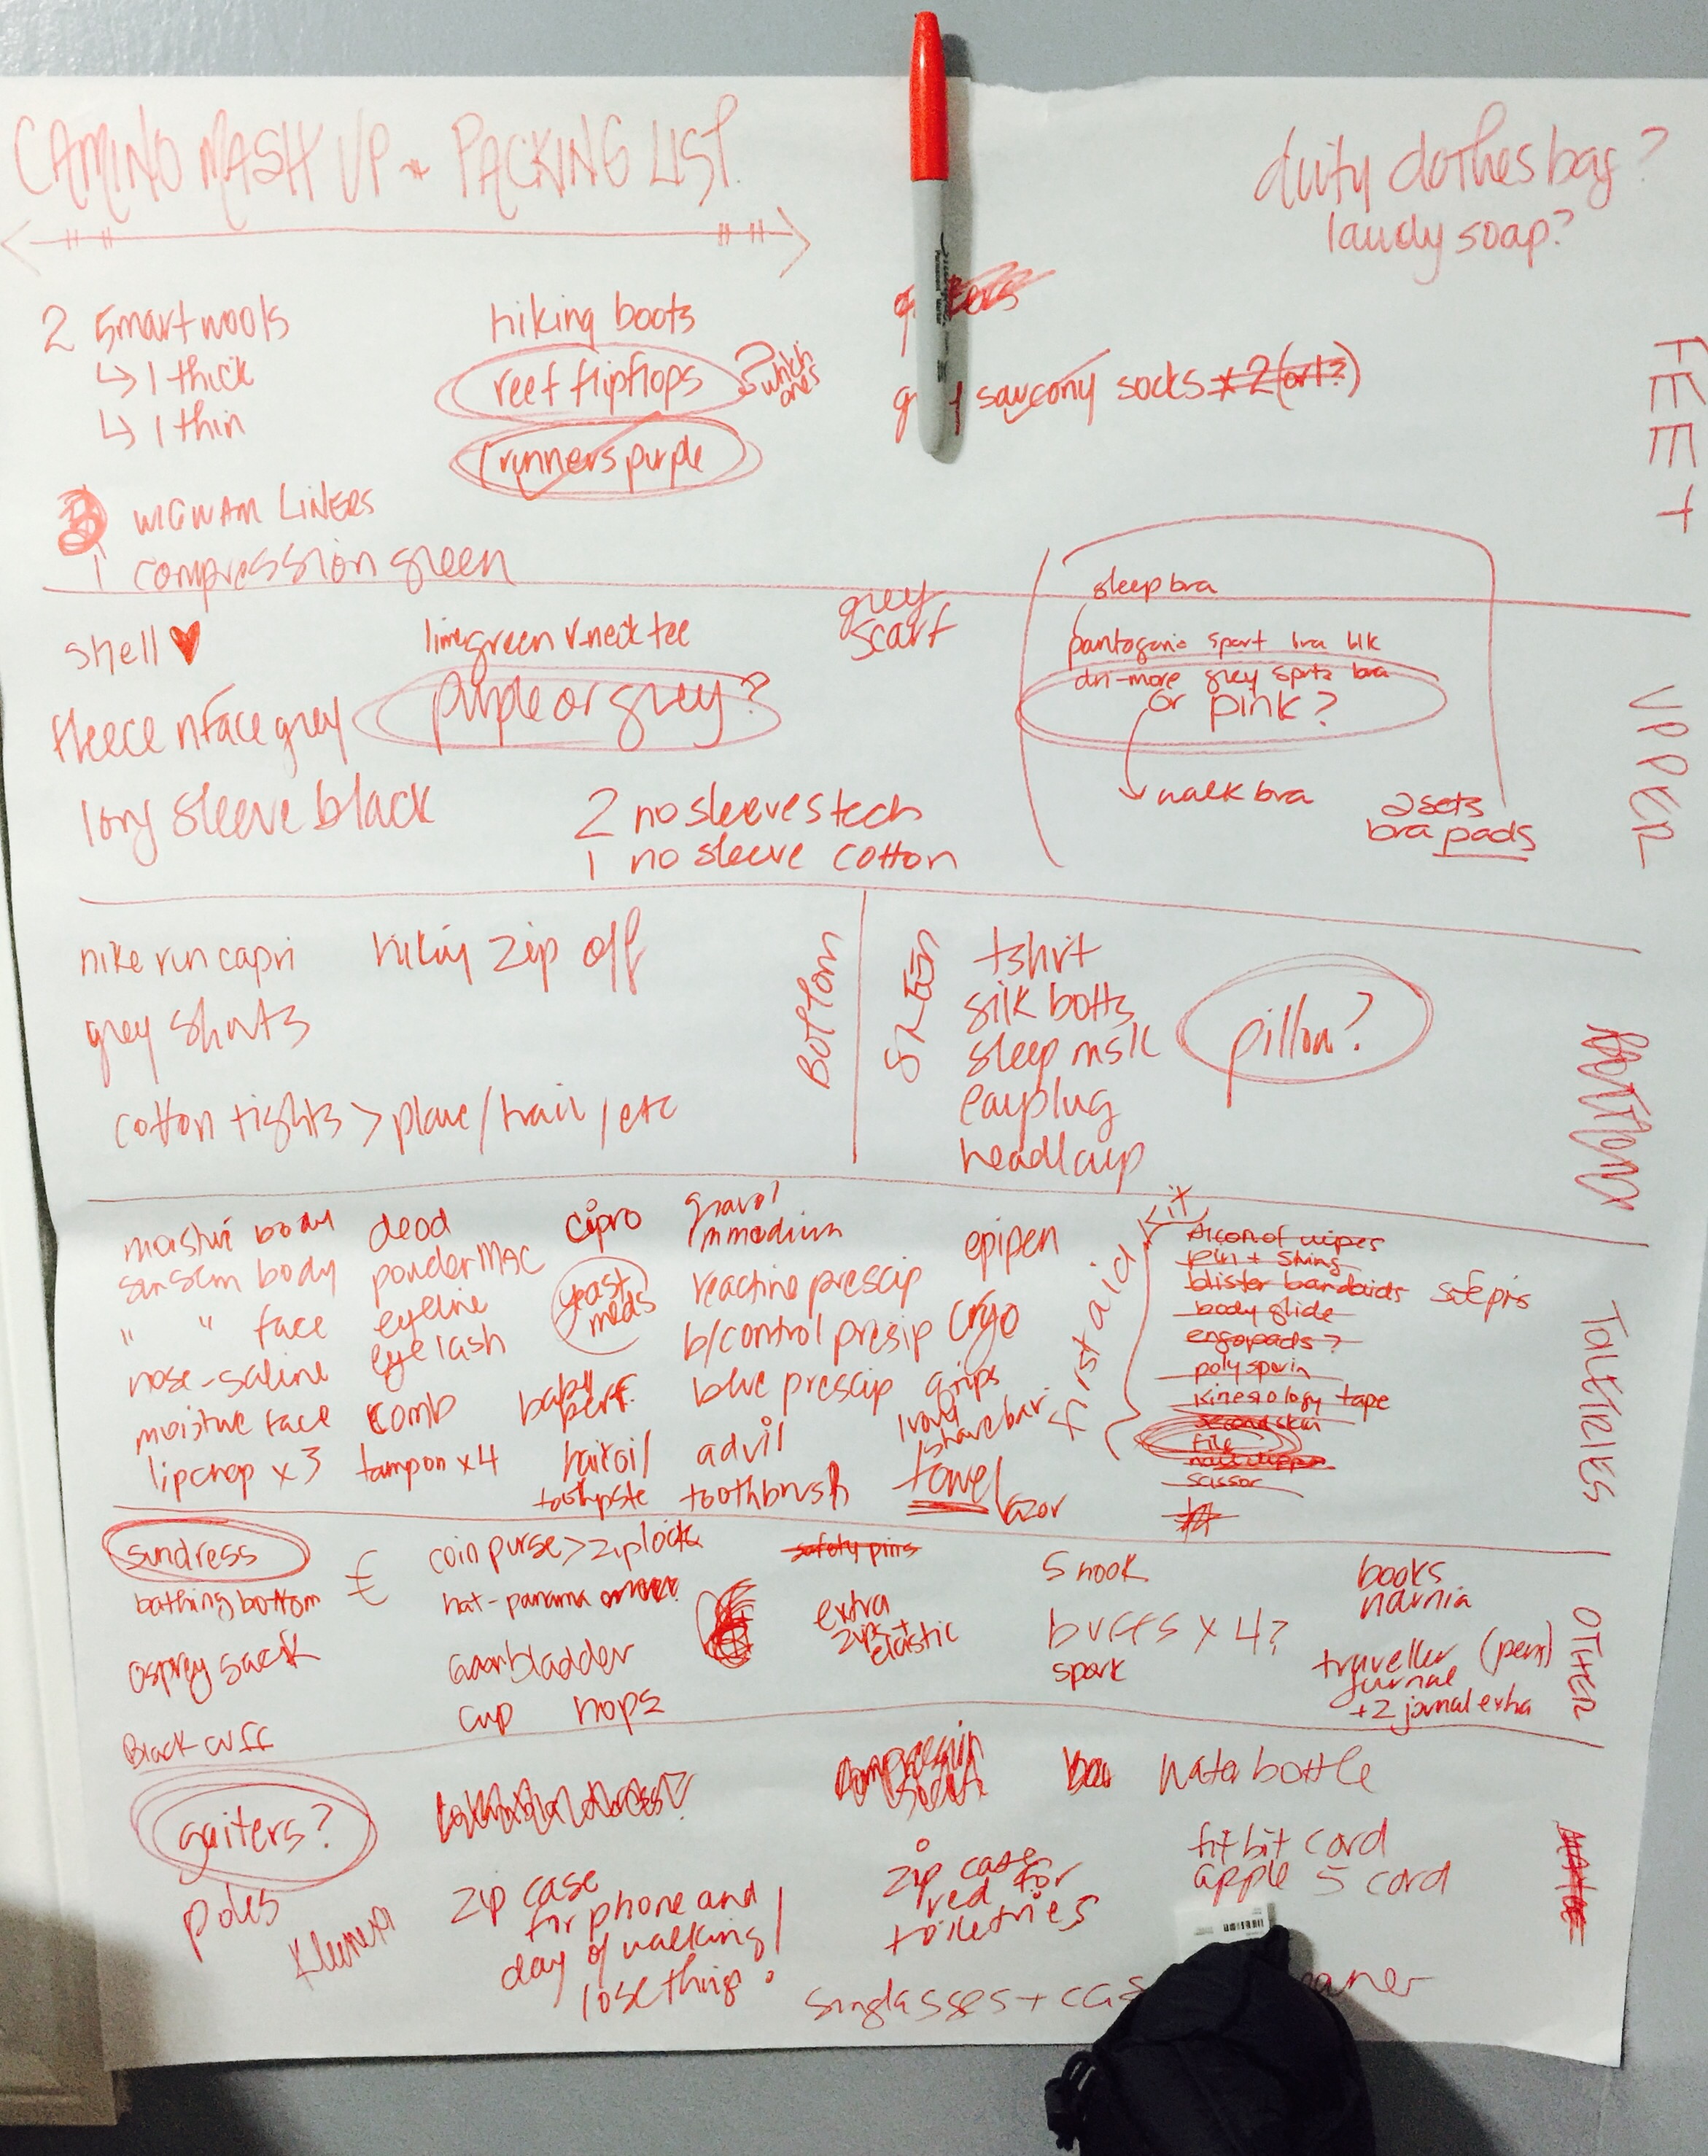
  2. Hang your packing list up beside it – and in detail as you decide. Do not just list 2 tech tshirts. No! List 1 smartwool red tech tee, 1 grey under armour tee. Decision made, moving on.
  3. Check off the list twice. When you add something to the pile highlight it, when you actually put it in your bag to depart cross it off.
  4. Keep a list of things you decided NOT to take and why (an example from my list: purple tech T-shirt do not pack, it rubs my arms weird on my pack straps). This may sound odd but trust me. In the last days and hours before you depart you will doubt yourself, and start to rethinking that purple shirt – the answer is NO because it rubs my arms weird which I figure out 2 months ago. Leave it home! Stick to the list.

Ok longest blog post with the most bulleted lists goes to this gal. I meet with our Dad and Daughters crew tonight about packing – this blog post is the agenda.

Brande (31 sleeps!)

Embrace the Over Think

To all you over thinkers out there, can I get a hey-0! I see you! I feel you! I am you! I have taken over thinking to the next level when it comes to trip prep, planning and packing. And I am here to tell you sometimes, believe it or not, over thinking can actually be an adventurer’s super power!

Give me a beat to explain …

Overthink Your Toiletries

We all wonder if we will have enough shampoo, soap, deodorant, bug spray, all the things when we head out on an trip. You don’t want to bring too much and add extra weight (these are some of our heaviest items) or take up more room than necessary BUT you also don’t want to take too little and be in a lurch having to scramble to find what you need in another country. Where you might be lucky if you can find the brand you prefer or even what you need. If helpful, insert a mental image of me spending way too long looking for Tylenol in a Pharmacy in Wales passing shelves of Paracetamol over and over and over as I searched. BTW Paracetamol in the UK is what we call Tylenol in Canada. Thank you Google!

To avoid spending more mental energy than necessary worrying if I am packing too much or too little for toiletries, I do a little scientific overthinking! Ok more of a simple experiment or trial but saying it’s science sounds so much cooler. Basically, I pack to stay home!

Ahead of your trip (aka WEEKS before you leave) fill those Goo bottles or travel containers or whatever you bought for travelling as if you are packing to leave right away. But, instead of just putting them in your backpack or suitcase, use them as if you are on your trip. As you use them, count how many days each thing lasts and compare it to the number of days you will be away on your trip. Then asses how that went! Did you have enough? Too much? Was the travel container you used totally annoying or did the lid break on first use? Then adjust accordingly for you actual trip!

I take this too far of course and literally have a little page in my journal to jot down for how long a razor lasts, how many shampoo washes, how many lathers my soap got me, how many brushes my toothpaste made happen, etc. So I can go total ‘science’ on my assessment and even have a little legend of my learning over a lot of past trips so I pack smarter each time.

If a trip is only a few weeks, I will pack all I need usually. Longer than that and I worry less about packing exactly the right amount of things I think I can find abroad and am not too picky about – this will save some room and weight. I.e if you are picky about your shampoo, but less so about your body soap – bring enough shampoo but a half bar of soap. I am very picky about my mascara less so about my chapstick – so bring the right size of mascara and only a few chapsticks.

A couple of tricks if you are running low on the basic toiletries while abroad:

  • Outside of the US and Canada, pharmacies tend to have the best selection of basic toiletries like Tylenol, face cream, body cream while grocery stores have shampoo, etc.
  • Keep your smaller travel containers after they are empty until you replace that item. It’s not easy to find travel size toiletries in some places, you may need to decant that shampoo you found at your destination into your travel container so it fits in your pack.
  • Check your accommodation for an honesty box or trail magic box for items people may have left behind. Often a hotel bathroom or pool area for shampoo, conditioner, body cream .. fill up your travel container!
  • If you are travelling with someone who has a preference for the same product as you – go in together on a full bottle. One carrying the shampoo and the other the conditioner to spread the love.
  • Figure out what 2-in-1 products work for you and only worry about one product and container instead of 2! I have a sunscreen moisturizer for my face that saves me carrying both. 2-in-1 shampoo and conditioner is another good one.

Overthink Your Wardrobe

You might be surprised to hear me say I recommend you take the same approach to the clothes you intend to pack. Yup, more science!

Once again, literally pack your clothes for your trip – from undies to shirts, pants to socks – pack like you are leaving tomorrow. Then over the course of the next few weeks and months at home wear what you packed and evaluate. If you are going on a tourist holiday, wear your outfits around town, running errands, meeting friends, long car rides, etc. If you are going on a hiking adventure, wear your outfits on your training hikes.

Evaluate each individual piece of clothing AND each complete outfit against the below trust-me-you-will-not-regret-this criteria. Oh and please kick this experiment up a notch by making sure you get some photos of you in each outfit – cause on your travels guess what you will be taking a lot of?! Photos!

  • Did it feel uncomfortable, ride up, fall down, bunch up, slide down, itch or scratch? If yes, ditch it!
  • Did you adjust the clothing item often? Pull on it when you stood up every time? Stretched it out before you put it on? Kept pulling up the straps, folding the sleeve, twisting the ties? If yes, ditch it!
  • Did it make me feel ugly, feel bla, all ick, too big, too small, too one colour, too many colours, too bright, too dull? If yes, ditch it!
  • Did you choose not to trial that one article of clothing or that outfit because it’s just so special and you only want to wear it on the actual trip? If yes, ditch it! For real! Ditch it! Ditch it! Unless it’s a bloody wedding dress, if you will not wear it at home trust me you will not wear it abroad. Ditch it!
  • Did you look at the selfies and photos of you in that shirt, pants, shorts, hat, jacket and delete or sneer or gasp or some other form of not-so-kind-to-myself response? If yes, ditch it! (you have my encouragement to ditch the article item forever to second hand AND delete the photos too)

Ok so you have thought about each article of clothing individually, now I need you to think about outfits. I am about to suggest something that may be cringe worthy to the fashionistas out where, but trust me … trust me!

If you cannot wear every top with every bottom you bring .. wait for it … IT DOES NOT GET TO COME ON THE TRIP! If that shirt you love only matches one pair of the 3 bottoms you are bringing, bye bye shirt! That skirt and tank only look good together and with nothing else you are packing, bye bye skirt and tank!

This is when you need to channel your brutal side folks. Over thinking to the extreme! Embrace it! You literally wear every, single combo of every single top and bottom you are packing and if even one shirt does not behave with all bottoms OR or you answer yes to any of the criteria above – that is a HARD NO! Ditch that article of clothing, no trip for it!

The process of elimination can take a few weeks but trust me – you and your pack will feel lighter for it! You will thank yourself!

This idea of overthinking is also totally applicable to trip planning check out My Planning Process. All you do before you leave on your trip will make the trip all the better and all the more real!

Brande

Let’s Pack – Packing Tips

12 sleeps to Scotland …

Our Scotland adventure to walk the Arran Coastal Way and climb Goat Fell Mountain is just around the corner, it’s time to start thinking about the actual packing – putting stuff in stuff. We have our Let’s Pack – Toiletries and Let’s Pack – Clothing lists and now we can go from lists and piles to actually packing it into a pack!

I have learned a few tricks over the years about the actual packing part and thought I would share them with you for your next adventure.

Roll It

Yup roll everything.

There are some folks who try and say folding everything nicely and all flat like is the best way. Nope! Actual science has confirmed rolling is the way to go – and my science I mean myth busters. Each little clothing roll takes up less space than a flat fold and you can tuck and squish and jam the rolls into little nooks and crannies in your pack (or luggage).

Don’t believe me? Try it! Pack flat and then unpack and do it all again rolled – yup told yah! Oh and if you are worried about wrinkles from the rolling, I get that but don’t think you need to worry too much. In my experience the wrinkle count is about the same with a roll or a flat fold and there is no getting away from the things. That’s all part of travelling I guess – being wrinkly and not giving one hoot cause you are on vacation!

Tip: half fold and then tight roll. What? For a shirt, for example, fold it in half with the arms laid flat over it – then roll it from the collar to the bottom. This will keep the arms all nicely tucked and the roll tight. For pants you flatten/fold the legs one over the other and then roll from leg bottom to waist band.

Stuff it

Quite literally stuff all the stuff! Have you heard of compression sacks, or light weight dry sacks or stuff sacks? These are magic bags! You jam them full of all your stuff (in rolls of course, see tip above) and then you roll or tighten the closure to suck out all the extra air and compress your stuff.

Here is a photo of the clothes I am bringing to Scotland:

Now here are all of those clothes, less my fleece, that have been rolled and compressed into my 8L lightweight stuff sack:

My fleece doesn’t go into the stuff sack because it will be coming on the plane with me as a pillow or shawl or blanket or maybe just a fleece as it was design to be. However I put it in this photo so you can use it to see just how small that stuff sack is – and it has all my clothes in it that were in the previous picture. I probably could have compressed it even more too!

You don’t need a heavy weight stuff or compression or dry sack for packing – something lightweight does the trick! So do not go out and buy those heavy duty water proof boat bags or anything – that will just add weight. We are focused on lightweight for backpack packing. Not only will these sacks help reduce the amount of room your clothes take but it also creates compartments of sorts in your pack or luggage to keep you organized.

Caution: using stuff sacks does not give you permission to pack more than you need! Just because there is a bit more space does not mean you need to fill it with that ‘just in case’ extra dress or that shirt ‘I hoped I would actually like on vacation’. Leave the untested and maybe items at home. Enjoy the space, not the extra stuff!

Ziplock It

As you have read in my past few blog posts – I love me some Ziplock magic!

I encourage you to put all your potentially messy and goopy stuff like shampoo, conditioner, sunscreen in Ziplocks when you pack it – both for the plane and on the the trip. I have been the gal who has a shampoo explode in her suitcase and can still get grumpy thinking about the mess lol

Ziplocks are also good for compression and compartmentalizing your stuff. The Sea to Summit or similar stuff / dry sack pictured above can be a bit tough on the budget – you will only ever have to buy em once and use them for every trip you will ever take in your life but they are not cheap. So if money is a consideration as I imagine it is for all of us – there is a back up Ziplock solution.

Grab some big Ziplocks to pack you clothes in. Maybe a Ziplock XL Freezer size for your shorts and pants, a XL for your shirts and Buffs, another L for undies and swimming costume. (I love that word)

Once you clothes are all nicely rolled and tucked into the Ziplock, you will want to push out as much air as possible and close the zip almost all the way. Leave about a 1inch section of the zip not closed. At this gap you are going to literally suck the air out of the bag and then close when it’s all gone. No joke. This really works!

Group It

Did you notice a theme among all these tips? I am big on grouping like items with like items and suggest this for anyone packing a bag, a pack, a suitcase.

Grouping your travel stuff basically mimics the organization you have at home. This will make finding things and re-packing things while abroad so much easier for you. Don’t be the person who has to un-roll and un-stuff everything to find that one thing – pack in such a way that you know where all the things are! This will save you time, reduce stress, keep your travel companions happy, and get you to the tourist stuff faster – the reason you packed all this in the first place!

There are a few different trains of thought for how to group items for your different stuff sacks, compartments or Ziplocks. Some people stuff by outfit – so they will have a roll for each day (bottoms, top and undies all rolled together) and out all those daily rolls in one stuff sack. I don’t bring enough tops and bottoms for each day so this never works for me but I do like the idea in theory. Some people may put all the tops on one sack and all the bottoms in another. This doesn’t work for me either because then I have to open both sacks each time instead of just one for the whole ensemble.

Finding the way that works for you may take a few trips or re-packs but once you do  – wow, the heavens will sing for ya!  Here is how I will be organizing for this hiking trip:

  • Big Stuff Sack: all my hiking clothes (not undies, socks, or outdoor layers like jackets)
  • Med Stuff Sack: all of my extra bits like pajama, city tourist clothes, train/plane clothes
  • Med / Small Stuff Sack: undies, sports bras, socks and liners, Buffs, toque
  • Med /Small Stuff Sack: all the dirty clothes

When I am on a non-hiking holiday, like a trip to a hot destination, I will have a large stuff sack for evening destination wear, a sack for daytime beach wear (bathing costume and cover-ups), a sack for my running gear, and one for all my undies, pajama, etc. So a bit different than my backpacking or hiking pack grouping but same idea.

Organize It

Roll it, stuff it, group it  – got it! You got the basics if you have all that well in hand, but  I figured I would dazzle you (ha ha I am probably the only one who is dazzled by packing ideas) with some additional packing / organizational tips to consider…

  • Shower Caps: use these to cover the bottom of the shoes you pack. You can use a shoe bag or Ziplock of course but when those aren’t available a shower cap works to cover the dirty sole of any shoe – the little elastic around the edge keeps it nicely secured. I steal every hotel shower cap I can get my hands on! Flip flops can go in one cap sole to sole and boots one cap per sole.
  • Make-up bags or pencil cases: back to grouping again here! Never leave an item loose! If you have some pens, highlighter, and a journal – put them all in a zippered case! Make it big enough for your wallet and passport too. If you have some toiletries you need on the plane (lip chap, hand cream, floss, etc) – put them all in a wee make-up bag or better yet the 1L clear plastic security bag at the airport. Little, light zippered cases will save you digging around trying to find stuff – from believing you have lost the 4th lip chap of the trip – and can add some personality to your pack. I have a pencil case for my toiletries that has a world map on it, I feel like such a globe trotter when I pull it out.
  • Extra Ziplocks and some elastics: toss a few of each in a case or extra Ziplock and bring them along. These are great for storing left over snacks, leaky tubes of face cream or whatever might bring en route, or soggy socks. Elastics are great for closing chip or crisp bags, keeping your journal closed when it’s full of train tickets and receipts or other ephemera, etc.
  • Carabiners: grab a few of these and attach them to your pack or your cases inside of your pack for the trip. A small one and a couple mediums should do the trick. These are great for clipping items into place in your pack or on your pack (like when you need to dry your socks you hand-washed that morning). I also use them to close the zippers on my city-tourist day pack so the sneaky pick pockets have to work a little harder. I use them to hand my towel or toiletries in the shower so my stuff does not sit on the floor wet. So many amazing uses for these things. Oh and you do not need to buy the rock climbing grade Carabiner – they should only cost you a couple bucks each for the ones you need.

Well that is my approach to packing the things in the things – now I am off to get some training in! With just 12 sleeps left I want to get as many miles as I can in every day – today I am touring downtown Victoria with 30lbs in my pack (aka my entire John Grisham novel collection) and my sneakers.

Next week we will talk about packing documents for your trip. Yup, even this subject is worth a whole blog post my Running for the Gate friends!

Brande 

Let’s Pack – Clothing


21 sleeps to Scotland …

packing_clothes_list

We talked about toiletries in my last post, Let’s Pack – Toiletries, so now lets talk about the biggest bulk of any suitcase, backpack or duffel bag… the clothes!

From conversations with many a travelling soul in hostels or hotels, on planes or trains, and chats among my friends and family – it seems to me that deciding on the clothes to bring on a trip is the toughest part of packing. I get that. This used to be something I really struggled with.

I used to hunt through websites and books for that perfect packing list – which of course alluded me as much as the perfect,  diet alludes us all. I would stand in front of my closet or dresser pulling out anything I might just maybe want wear while away on a trip. I would think of every possible scenario that could ever possibly happen and make sure I had an outfit for it. The result was always way too much stuff. My suitcase or pack would be burden not a comfort. Why was I creating burdens to take with me, when the whole idea of trip is to ditch those burdens at home and travel light and free?

Well after a few trips of carrying way too much, I started to think about what principles I could apply to how I pack that would reduce the amount I take on a trip without leaving me unprepared. Not only was I keen to stop over packing, I was also keen to make the act of packing a little less stressful. Also, if it made picking what to wear while abroad a little less stressful too that would be fabulous. So over a few more trips I developed some principles that really, really work for me – happy to share them with you here!

Packing (Clothes) Principles:

  • Leave items that still have price tags at home (or at the store)

If you have not worn it and loved it, it does not come on the trip. There is nothing worse than discovering a shirt is uncomfortable, those pants ride up, or even that something is broken or you don’t know how to use it when you are abroad. That was precious pack space and weight that has been spent on an unworthy item. Test every item you are taking with you before you take it with you.

  • Leave anything that is too special to wear at home, at home 

Clothes that you are not wearing at home are not going to get worn on a trip. We are creatures of habit and will reach for those comfort items more than the new or special almost every time. That summer dress you have been saving to wear again when you next go to Mexico – don’t bother packing it. If you don’t love it enough to wear at home it does not deserve a place in your pack. Only items that bring you joy, no matter latitude and longitude, should be coming with you on your travels.

  • All tops and all bottoms need to get along 

This is a tough one folks but has the most impact. This one principle will make decision making so much easier when you pack and when you decide what to wear while away. Here it is … every top you take should match any bottom you take. So that tank top needs to match the shorts, skirt and the pants you are packing. Those tights need to match every shirt you are taking.  An easy way to achieve this is to stick to black, grey and khaki on the bottom; with solids or muted, simple patterns on top. Refer to the next principle if you need more spice than this principles suggests.

  • Always pack a scarf or pashmina shawl 

Some of y’all will think this only applies to the ladies, but for those fashion forward and comfy-in-their-own-skin men I would also recommend this one for you too!

While I have been using the same grey scarf when I travel for 15 years, this is where I encourage you all to add a little more ju-ju (some spice for those of you who do not watch Queer Eye) to your trip wardrobe. Don’t let my easy choice colour deter you from some pizzazz here. Caveat is you need to be willing to wear it with every top/bottom combo you have. For people like me who are fashion-challenged this means a neutral solid colour like grey but for those of you who actually have a sense of style you can kick it up a notch here and get your own look on.

A scarf is great for so many things: when you are chilled and need a little something more than you have on but less than a jacket, a pillow on a plane or train, a fashion accessory, to cover knees or shoulders when visiting churches or sacred locations where you have to cover up, a make shift dress while all your clothes are in the dryer due to bed bugs, as a towel in a pinch, a tourniquet and more. I also use mine to create some privacy when staying in hostels – pick the bottom bunk for your bed, and then tuck you scarf under the mattress above you and let it hand down like a curtain.

With just these principles in play I guarantee you your packing stress will be reduced big time. Don’t trust me – try it! Oh and if you are heading out on a overseas long distance hike trip, I am also happy to share my full packing list with you too. Here we go!

Packing List – Arran Coastal Way, Scotland:

This list takes into account that our trip to Scotland is 2 weeks long , is largely based on hiking 20+km each, includes only a few urban tourist days, includes flights of over 10hrs, and temperature will be summer moderate 20C with rain on a pretty regular basis. This is a long distance hike to different accommodations each night, not a thru hike.

packing_clothes_clothes.JPG

Hiking – Bottoms

  • Hiking Capri
  • Hiking Pant
  • Hiking Shorts
  • Undies (cotton recommended) 1 pair/day

If you have zip off hiking pants that’s even better – as you can drop one of the other items from the list. For example if I pack my hiking pants that zip off into carpi length then I don’t also pack my Capri pants. Oh and make sure you trial your pants on an actual hike before you go. Shorts that ride up. undies that crawl or pant waistbands that bunch under your pack straps can cause rubs and even blisters that will ruin days of hiking for you.

Hiking – Top

  • Technical Long Sleeve
  • Technical Short Sleeve x2
  • Technical No Sleeve
  • Sports bra x2

I prefer short sleeves over no sleeves as I don’t like the pack straps being directly on my skin and it reduces the need for sunscreen on some hard to reach parts like the back of my shoulders. But if you prefer no sleeves then just flip the numbers here.

I always take 2 sports bras as I find they dry too slow to wash one evening and wear the next day. Also I want to wear the non-sweaty one in the evening after a hike post shower. In a bind, pun intended, you can also use your buff as a boob-tube of sorts if both the bras need a clean and dry. Again, make sure you do a few hikes in all your gear and especially your bras. Falling straps or pressure spots where a clasp is will make you crazy on the trail. If its uncomfortable at home it will be annoying as heck abroad.

Hiking – Outer

  • Gortex Jacket (shell)
  • Fleece jacket / layer
  • Toque (Buff can work)
  • Sun / rain hat
  • Departure Day Decision: Gortex rain pants

If you do not have Gortex outer layers bring the very best rain gear you can afford, borrow or already have. Arriving at to your accommodation soggy at the end of the day is all good when you have a bath and heat available – but what if you don’t make it, get lost or are tenting? Sogginess can make for some morbid outcomes if you cannot warm up and dry off at the end of a hike day.

Also, make sure you can put all the things on – trial having your no sleeve, short sleeve, long sleeve, fleece and shell on to make sure they all fit and are comfortable. If you cannot put your rain shell on over your fleece and base layers, you need a bigger one. You want to have things fit nicely over each other. Not too tight or you will be uncomfortable but also not too loose as you will lose heat in those spaces.

Hiking – Feet

  • Hiking boots
  • Hiking runners or sneakers
  • Flip Flops
  • Smart Wool medium hiking sock x3
  • Hiking liner sock x3
  • Running sock (ankle) x2
  • Compression sock (knee length) x2
  • Departure Day Decision: Gaiters 

This is largely where personal choice comes into play – there is nothing more important that finding the shoe or shoe combo that works for you. If you need some help deciding and want to know why I prefer a hiking boot and running shoe combo, check out my blog post 8 Weeks to Isle of Arran – Feet. No matter what your footwear preference is you need to test it over and over again. Make your decision early and train in them.

I take a number of socks because I have specific combos for my boots and my runners which I toggle between everyday depending on the trail terrain. I also take more than a couple Smart Wool Medium Hiking Socks as I find they tend to stretch when moist or after a day of travel and that is blister city for me if I don’t switch them out for a new pair. When you are training, find your combo and adjust this list accordingly.

Hiking – Head

  • Toque or Buff
  • Sun / Rain hat

I go nowhere without my Patagonia Beanie so this may something that you don’t need to bring with you if the weather where you are heading is always moderate. I love mine for cool morning starts, pints on the patio with the sun setting, and to block the light when sleeping on planes or train stations.

The sun/rain hat should have a decent rim on it to keep the elements from your face and neck – a good brim is also good for keeping the bug netting off your face if we have to resort to this measure when the Scottish midges get too bad.

Hiking – The Other Bits

  • Day Pack (rain cover)
  • Bladder
  • First Aid Kit
  • Hiking Poles*
  • Buff x2
  • Sunscreen (face/body and lip)
  • Bug Spray
  • Trail Guide, Map, Compass (waterproof map case)
  • Phone, Camera (Ziploc bag)
  • Some extra Ziploc baggies (to transfer your snacks into)
  • Carabiner x2 (to dry clothes while walking)
  • Departure Day Decision: Hiking Poles

Many of these items will also be part of your sight seeing tourist days as well – your phone, camera, hat, sunscreen, bug spray, Ziploc baggies are all daily items no matter the activity. Even a Carabiner or 2 should be clipped onto your lightweight day bag or purse so you can clip on anything you buy, secure your water bottle, secure the purse to your clothing (if you are in a high rate pick pocket city), etc.

packing_clothes_other.JPG

All The Other Things

  • Top and bottom pajamas (cotton)
  • Sleep mask
  • Earplugs or headphones
  • Cotton tights or light pants
  • Cotton No Sleeve, T-Shirt or Long Sleeve
  • Cotton button up (or Technical UV Button Up)
  • Journal and pens
  • Scarf or Pashmina
  • Light weight bag or purse
  • Light weight water bottle
  • Cotton undies 1 pair/day when not hiking
  • Small Ziploc of dry laundry soap

I am a big advocate of natural fibers when technical gear is not required. They just feel comfortable and cozy and I like to have what is immediately next to my body be as natural as possible. So I am all about the cotton undies everyday on a trip even if you have to bring a few extra pairs as they don’t wick as well as synthetic fibers. Also, I always wear cotton tights, cotton tank or tee, a cotton button up shirt, my scarf and compression socks on a long haul plane trip. This keeps me in cotton, gives me layers for when the temp changes on the plane, keeps the feet swelling down and is almost like being in pajamas without the world knowing it.

Do you have to do laundry on your trip? To have your hiking clothes available for sight seeing or vice versa you may need to do a little laundry. If you can find a laundromat great but I tend to not worry about that and just hand wash a couple of items each night or every other night. I do not put any of my technical gear in the dryer so a sink wash and a hang dry works for me – especially in the United Kingdom where most rooms have a radiator heater for quick drying.

Departure Day Decisions … prior to departing I will check the long term forecast and make a decision on if Gortex rain paints are needed. I will bring them if we they are forecasting a 50% chance of rain for 50% of the hiking days. I have read the guide book and continue to read blogs about the trail and will use this info to decide if Gaiters or hiking poles are needed. I will bring Gaiters if 50% of the trail is either high grasses, through overgrown bush or over gravel, pebble, shale based trail. This will keep the ticks at bay and the rocks out of my shoes which are blister makers. I will bring the poles if there is a 50% elevation gain or drop on 50% of the hiking days. This will keep my balance up and reduce the pressure on these four decade old knees.

There you go – now off I go to put all these items together!

Next week I will post some packing tips – some things I have learned that help make the actual act of putting stuff in that duffel, suitcase or pack easier before you go and when you are off gallivanting.

Brande


Goat Creek to Goat Fell

Yahoo lassies!

On Monday the crew of us heading to Scotland to complete the Arran Coast Way in July had our one and only chance to train all together and it was awesome!

Shar selected the Goat Creek Trail for us seeing it would mimic much of our path in Scotland. I sure hope so too because the trail was great and I could do that for a week for sure!

The trail starts at the Goat Creek trail head just outside of Canmore and ends 19km later at the Banff Springs outside of Banff (the trail tail / trail butt as Rosa and Shar joked).

The path was undulating for the most part, up away from Goat Creek and then back down again as we left Canmore further behind and gained on approaching Banff. Just a few slogs up overall really – what a treat!!

At the head of the trail there was a big ole sign warning of wolves and grizzly bears in the area. Always a nice ‘welcome to the trail you hikers who may also double dinner’. Ha! Usually I see these signs when I am alone hiking and they freak me out – which 4 of us hiking though it was way less intimidating. Ok maybe not way less but at least a bit less.

Best way to curb the ‘gonna get eaten’ fear is to launch into full ‘don’t eat me’ mode. This includes being generally loud on the trail – holding conversations, hollering out a word or two every 50 feet or when approaching a bend in the path or a creek, and staying together if you have a hiking tribe.

Really you are just hoping to scare any wildlife away before there is any chance of you startling them into eating you. We also did a quick run down of what to do if we do see a bear, cougar or wolf so we were all on the same page. We did this loudly of course as part of our ‘be heard and be seen’ wildlife strategy. (I like to call things strategies so they sound all planned and awesome – even though this this was more of a ‘holy crap, what if’ scenario discussion.)

We had a lot of fun with the calling out a word every 50 feet or so strategy; turning it into a game of sorts. This keeps the bears away, is fun, and seems to eat up the miles quickly! We did the classic name that country sound off starting with A thru to Z, then a round for celebrities and one for names of songs. This last one may have include some short bursts of singing which may have been the best thing for keeping those pack hunting wolves at bay. At least when I was belting out the ole Toy Soldier by Martika! Remember that one?

During our walk we focused on a two things – the beauty of the trail and our gear. Lots of gear talk. Mostly gear talk. We were out there on Monday to test gear. Everything from socks to hats, and from undies to backpacks to see what will make the cut for Scotland.

I discovered my penchant for being cheap has resulted in wearing decade old SmartWools that don’t keep their shape any longer resulting in under the heel blister potential, and that my new hiking capris from Eddie Bauer are great but they are not the replacement for my long standing favourite Nike capris that need to make one final trip me thinks. I also confirmed that after logging probably 1000s of kilometers in my Asolo Backpacking boots across the globe I may need to splurge for some new insoles. I better get on that quick so I can train the next 6 weeks in them before we depart.

Rosa tried the switch from boots to shoes technique to see how that worked for her dogs – a strategy I deploy on 20km+ days with great success especially when it includes compression socks! Cheryl discovered that the pants she thought would be perfect were not and will not be making the cut for the trip’s packing list. Shar confirmed her hiking shorts are perfect for the trip and that the wax from Baby Bel Cheese can be used to prevent sunburns on your the nose if there is ever a shortage of sunscreen.

Overall the trail of 19km took us just over 4 hours at a very easy pace with lots of wee stops to check and test that gear and some snacks mid way too. The weather was overcast with some small breaks of sun – perfect for hiking! Not too hot or cold. Oh and

A little extra time was added to the trip for an extra special reason! We had to make one special pit stop for Rosa to see if Jamie Fraser of Outlander was perhaps at this standing stone – nope, she did not hear bees. Doh! We will try every standing stone in Scotland for you Rosa until we find him.

Oh and we had to stop for Shar and Cheryl to knock off a few yoga moves for those tight ham-dogs and hip-flexors too.

We rolled into Banff arriving at the trail butt by the Banff Springs Hotel of amazingness. But us classy gals didn’t stop there for a cool, fancy drink. No way! We made our way down to Buffalo Bills for a cold pint and some meat!

Then we headed up Banff Main Street to catch the Roam bus for $6bucks back to Canmore where our vehicles were waiting! Lots of peeps bike the trail we walked so there were even some bins strapped to the front or the back of the bus to bead back to Canmore.

Am awesome trial and trail day for all of us! We all loved the trail and each of us figured out something a little more than we knew before about our gear for Scotland.

Eeeek the trip is coming fast!

Brande

Final Prep and Packing for the Camino

With just 3 sleeps left to departure for Paris then train onto St. Jean Pied de Port to start the first of 3 Camino trails things are starting to get very real – and I feel like I am taking over the house with all of the final prep bits!

My scrapbook / craft studio has become a large display case for what will go in my backpack on Friday morning and for the next 36 sleeps after live on my back day to day, kilometer after kilometer. Everything is laid in a specific order (to me). Rolled where final decision has been made and that item is for sure coming – and only folded if I am unsure if its the “one” that gets to come with me. Post-it notes where I still need to grab the stuff from drawers or the laundry room or the drying rack.

My scrapbook / craft table has become a language lesson centre with all of my language cheat sheets spread out and ready for me to add to as and when I hear a word or phase in French, Spanish or Portuguese from my playbacks I didn’t write down yet. I am starting to get the languages down pat (well good enough anyway) but my “accent” for each is sounding oddly blended. I am rolling Rs and sh’ing Sh all over the place, even when I don’t need to. I am hoping that the nice people of the countries we visit will just find me eccentric and dramatic but still understand me. (like y’all do here in Canada!)

My kitchen counter has become a language playback display case. Each day and sometimes more than once a day, I grab one of the language lesson playbacks and throw the ear plugs in and practice. My morning run today was Portuguese. I was French on the way to work and back, and am about to get some Spanish in this evening. I have to return all of these to the library on Friday morning before we depart on a jet plane – so packing in my final refreshers while I can. Muy bien!

Finally, my poor walls have also been dragged into this prep mayhem with a large (think movie poster size) packing list in red Sharpie taking up some serious real estate. What is certain is written out, and what is still up for final decision is written and circled. Thurs night (last night home) I will compare the poster list to what is on the floor and cross the items off accordingly with a black Sharpie if they are there and make the final cut for the journey. { If any of my staff are reading this this post, you now have proof that I subject myself to the sharpie and post-it poster ordeal too – it’s not just a special torture I save for you all. LOL } 

By Thursday night all of these spaces and places will be returned to normal, and the house will get one final deep clean from me … leaving my hubby with a beautiful and back to normal home while I am off putting miles on with Lana!

Weird. I couldn’t help thinking this morning that it was my last Tuesday waking up in my own bed until October. I think of all back-home comforts I will miss, the top of my list is my hubby (of course, big style) and the second is my comfy, amazing, no other pilgrims snoring or making other gaseous sounds, bed bug free, king size bed.

It’s the simple things in life, you know?

Brande

PS tres duerme


Merely 3 Sleeps (Packing List)

Wow, wow, wow! Someone pinch me I cannot believe that this epic African adventure begins in just 3 sleeps. There is no way I am sleeping tonight. The excitement is crazy in this house and I am way to energetic to sleep.

I wonder though if it works like Christmas? You know when your parents told you the faster you go to bed the faster Santa will come! I think I will test this theory tonight and hope that my usual dreams of Kilimanjaro do not wake me from a dead sleep wondering if I remembered to pack socks, undies or my water bottle!  But then if I go to sleep and it does come fast, then the faster it comes the faster it will be over and then … STOP Brande! Enjoy, embrace, breathe and take it all in!

Ok well enough with that spiral of excitement with a side of worry, here is what I accomplished today in prep for departure … I packed for the tourist part of the African adventure (the other 4 weeks we are away).

packing for Africa

Everything you need for 4 weeks in a 65 litre pack? No problem!

For anyone doing a 2+ week trip in a warm weather climate, here is the packing list that has treated me so well for so many vacations to date and is exactly what I used for this African vacation as well!

Upper:

Rules: everything should be plain, solid coloured or an easy print. Think about bringing stuff that you could toss your 1 scarf on with (see below) to change the look technically getting you another outfit without actually changing. Also, everything on top must match everything you bring for bottoms so really think about the fabrics you bring and the colours. BUT DON’T OVER THINK!  Oh and keep the cleavage and the spaghetti straps to a minimum, we don’t want to draw too much attention to the goods.

  • 3 T-Shirts
  • 1 Long Sleeve T-Shirt
  • 1 Sweater
  • 4 Tank tops
  • 1-2 technical shirts (tank, tee or long sleeve – these are good for when you are working out, hiking, jogging, or even to wear under a wet suit)

Lower:

Rules: everything again should be solid coloured, this is not the time to bring out those stripped crazy pants! Also don’t go too short on the shorts, tourists should dress modestly. We want to see the sights not be the sight to see! 

  • 1-2 Shorts
  • 1 Jean
  • 1 Comfy / Travel Pant
  • 1-2 Sporty Pant or Capri (think of what you want to wear driving for hours, and also good for the plane, and for sight-seeing)

Full Body:

  • 1-2 Summer, Simple Dress (apply the same rules you would for the Upper above – plain, solid coloured or easy print and must match your scarf and your sweater)

Water:

  • 1 Bathing suit you like that you could hang out in all day (for any of you who groaned when you read the fact that you need a bathing suite, email me and I will remind you that you are beautiful and amazing!)
  • 1 bathing suit that could work under a wet suit or active water activities (not necessary if you can do it all in the 1 bathing suit you are bringing but I tend to bring a a robust bikini top and little shorts plus my nice bathing suite for just pool and beach time)
  • 1 Bathing suit cover up

Other:

  • Scarf or Pashmina (think simple, solid or easy print again – you should be able to put this on with ANYTHING you have brought with you in the Upper, Lower and Full Body sections above)
  • Wind stopper / Water resistant jacket
  • Flip flips or sandals or flat closed toe shoe like Tom’s that can be worn with everything above, get wet, and worn out (no crazy bling, they had better not cause you blisters, and break them in before you go!)
  • Runners or light hikers for when you need to get your sweat on
  • Pajamas (top, bottom, comfy sleep bra)

Unmentionables:

  • 2 sports bras (hopefully some of your Uppers above allow for this comfort, and for around the hotel in pajamas, etc)
  • 1 nice light coloured bra
  • 1 nice dark coloured bra
  • 10-12 undies (if you have light coloured Lower stuff be sure to bring a mix of light and dark colours)
  • 1 slip if needed for your dresses OR 1 slip shorts (little slim fitting shorts made of slip material so you get the slip and avoid thigh chafe)
  • Socks for those shoes you brought

Toiletries:

  • Keep this simple – before you go, one day put everything you use to get ready, in the morning, every medication you take, and what you use to get ready for bed at night in a basket – put all that stuff in a cosmetic bag and voila! (Do NOT even think about packing that face mask or night cream you have been dying to try with you – you will not use it, it will be a waste of room and weight in your bag.)
  • Sunscreen … I should not have to specifically mention this because you should be wearing this everyday but if you do not … start and pack some!
  • Extra, travel specific meds (Think about any possible issues you would like to be able to deal with quickly without the hassle of foreign medical services. Bladder infection, traveler’s tummy, etc)

Might be worth thinking about:

  • Some laundry soap so you can hand wash and dry anything on the list until or in absence of a Laundromat
  • Some little and big zip locks, just a few and just in case
  • A thin bag for your dirty clothes to keep it separate from your clean stuff
  • Hat (something that goes with the Upper and Lower above)
  • Travel towel (for your water activities)
  • Toe nail polish
  • Book(s) to read
  • Journal and pen to document your adventure
  • Handbag / courier bag – small but big enough for camera, snacks, water, etc. but not so big that your hips or shoulder aches from carrying it!
  • Camera, more camera cards than you think, charger
  • Sunglasses

From my backpack to yours!

Brande

PS: Did you know 3 sleeps is only 72 hours? eeeeeeek so excited!