6 Sleeps and 6 Must-Haves

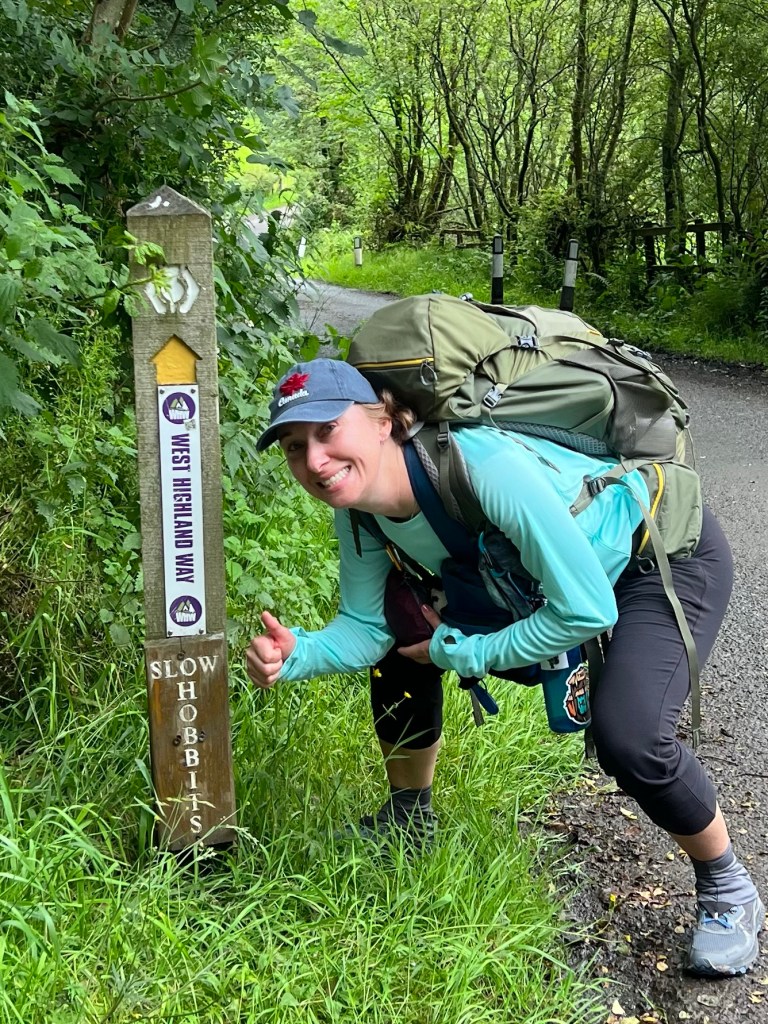
Our departure for England to walk the Coast to Coast Path is fast approaching. Just 6 sleeps left – well, I am probably too excited to actually call them sleeps. This time next week, we’ll be on our adventure!

As we put the final touches on what we will be packing for this trip, I started thinking about some of the must-have items that I take with me every time. The little things that I realized over many trips are my must-haves. I thought I would share these must-haves with you to see if they might be helpful for any future trips you might be taking. They are not specific to my usual long-distance path adventures, even though those are mostly what I talk about here on Running for the Gate. For any travel, here we go ..

  1. Carabiner! A large carabiner is a must-have. You do not need the super-expensive, official carabiner used by actual rock climbers. Rather, I am talking about a large carabiner that you can often find in your Canadian Tire, outdoor store, department store, etc. They are fantastic for hooking onto the seat back on a plane or train to keep your bag or hat off the ground, for clipping on to your backpack so you can hang your shoes instead of jamming them inside or to hang wet socks to dry or your hat when you do not need to be wearing it. They are also fantastic for clipping your bags together when sitting in airports and train stations to make them harder to swipe (swiper no swiping!).
  2. Ziplocks! A combination of a couple of large and a few sandwich-sized sized ziplocks are a must-have. Roll them up into a tiny little tube, and they can be tucked in any small spot in your backpack. These little beauties are fantastic for your sunscreen that exploded, the snacks you opened like a wild beast and now the package cannot be closed again, the cheese and bread you grabbed in the morning to eat on the train or on the path for lunch, as a small trail time garbage to pack out what you packed in, etc. So small and light to carry, and so mighty in what they can do for you.
  3. Stuff sack for laundry! A stuff sack that you can use for your dirty laundry is a must-have. No matter what kind of travelling you’re doing – hiking or tourist, or a combo – dirty clothes are exactly that, dirty (and often stinky too). You do not need them tucked in next to your clean clothes. That just makes more dirty clothes. I use a stuff sack for my dirty laundry so it is separated, and so I can squish it down so it does not take up as much room. For some reason, dirty clothes feel like they take up more space. Not sure if that is just me or science. A stuff sack keeps them separate, small, and gives you a cute little bag to carry them to the laundromat with too. I toss my stuff sack into the wash with the dirty clothes and then pull it out before the dryer so it gets clean too.
  4. Book! A book is a must-have. I do not mean a book on my phone. I mean an actual physical book. I love reading, so there is that, but I mostly love that a book is a big ole, global signal for do not talk to me. I travel alone quite a bit, and that means I want to be alone, not talk to strangers, and am here for the peace and quiet. Not a stranger’s chatter. I find that once I have my nose in a book, no one approaches me. I have my book, my pint in a pub, or a coffee in a shop, and I am free to enjoy my me time. Bonus: from behind a book, you can also secretly people watch and for sure people listen while it looks like you are just quietly reading, not being a Nosey Nellie.
  5. White noise app! A white noise app or some sort of sleeping sound is a must-have. I find that every hotel, B&B, and campsite has its own sounds at night, and I find it really distracting. The elevator in the hotel hallway or the crunchy sound at the campsite that you are convinced is either a bear or a creepy vampire can ruin your sleep. A white noise app is an easy way to set a quiet and constant noise in any place you sleep. It signals to your body it’s sleepy time and helps you ignore some of those new sounds that may interrupt your sleep.
  6. Copy of your passport! A copy of your passport is a must-have. Take this with you just in case your real passport is stolen or missing, but I suggest you take a digital copy (password protected). This way, you have a copy to show the Embassy to get yourself a new one if yours is lost. I also leave a digital or hard copy behind with my husband. That way, should something happen to me, he has the info needed for the authorities to check borders and other passport checks to find me. (Bonus: also leave behind a very detailed itinerary, including the phone numbers of places you stay, just in case your loved ones need to reach you and you have no cell coverage.

Those are my must-haves, and it will probably not surprise you to hear that they are already packed for my departure in 6 sleeps. Did I mention 6 sleeps?

Brandé

8 Sleeps and 8 Tips for the Footsies and Tootsies

With just 8 sleeps to departure, my mind goes to the final prep and packing – this includes ensuring I have what I need for my feet (socks and shoes) and to treat my feet (blister care).

Walking Long Distance Paths (LDP) can be about the views, the experience, the people you meet, the culture you discover, the health benefits, the goal, etc. Everyone has a different reason or reasons for taking the first step on their LDP of choice, but one thing is true for all of us … our feet are stars of the show here, they are making the magic happen! Step by step.

When I think of our upcoming Coast to Coast Path walk and how many steps it might be, it’s a lot! At over 300km and assuming the average km is 1,400 steps, that’s a whopping 420,000 steps, at minimum. With how hard I will be making my tootsies and footsies work, I better take care of these little beauties.

With just over 2000 km of LDP steps under these feet, I thought I could share my footsie and tootsie care tips to see if one or some may also help you on your long or short distance journeys!

Before you go …

  1. Pick the right shoes! Don’t opt for a backpacking boot if you only need a trail runner, and vice versa. Consider a trainer instead of a boot if you are mostly walking on footpaths and quiet county roads, rather than up and over mountain passes. The bigger, the more robust, the more waterproof, the heavier (and expensive). That’s, of course, perfectly fine if you need that, though. Go into an outdoor store where outdoor people work and give details on your adventure for the best advice!
  2. Train, train, and train! This is incredibly important for your joints, strength, and stamina, as well as your footsies. They will get used to a lot more steps if you give them a little runway before you head out. And I don’t mean a couple of big hikes or a single weekend on the mountain either. I am talking sustained and regular hiking over weeks before you depart. You are NOT looking to jump-start your tootsies; rather, you are looking to build up their resilience. Check out my 20-Week Training Plan, which has never failed me for a 300km trip lead up.
  3. Discover your sock combo! The goal of your training is half getting your body ready, and the other half is finding your perfect gear! As you train, try out different sock types and combos. My sock combo has changed a few times over the years with different shoes and trails, and the ole body (including my feet) getting older and wider. I have been a liner and medium hiking Smartwool, I have been a light single Smartwool, and am currently an Injini (the socks with individual burrito toe pockets) gal. Find your combo through trial and error, most importantly, before you go!

While you are hiking…

  1. If it’s hot, you stop! Any tiny rub or pebble or sock bunch or hot spot or odd pain or odd twinge from your feet as you are on the trail is a sign! Stop, drop, assess, and treat! Even if you are hiking in a group, do not hesitate to drop and check things out – people don’t mind, you would stop for them! So don’t wait for lunch or until you get to y or see x. Right now! The best thing you can do for your feet is prevent a blister from ever happening – once they are there, you go from a little hot spot happily protected with a Compeed to an open wound that has the potential to hurt, get infected, ruin your time, and maybe even your trip. Yeah, that sounds dramatic, but for all those in the crowd who have been there, it’s for real! As you work on opening up to the sounds and feels of nature, keep a few of those senses tuned in on your feet, too. There are a number of ways to treat blisters. Deep dive into some YouTubes and try what works for you – everyone has their own trick.
  2. If you sit, your socks come off! Your feet need a break, too. When you stop for snacks at 11-sies, lunch, late lunch, 2-sies…whatever your schedule…give your feet a break from their shoe and sock prison. Take the shoes off, open up the laces, and pull back the tongue to get some air in there. Then take those socks off, lay them out to dry (from sweat or rain or both). Finally, do a little footsie and tootsie inspection. Wiggle the toes, give each a little rub, and give your foot a rub too. While feeling for any issues, also visually check things out. Treat what you find. Wash those hands, and then have your break while your feet are up! Don’t hang your feet down off a ledge or sit on them, pop ’em up on your backpack or a stump, or at least beside you on the picnic bench. Before you set off again, give your tootsies one more inspection, then put on dry socks! Either change out the ones you had for new dry ones, or the ones you had if they feel dry).

End of your hiking day …

  1. Put those feet up or cool them down! When you arrive at your destination, put those feet up for 15-30mins! In a hotel or BnB, literally lay on the floor or bed and put them up the wall OR in a tent, lay on the ground and get em up a stump or fence! Pulling off the shoes and socks before you do is extra special, and some nice slow ankle rolls and toe wiggles feel amazing, My sister (my usua. LDP companion) and I like to use this time to sip a post hikng day tea and a little debrief of the day as we wiggle our toes in the air. The other option is a cold soak. If you hae a place to stay with a foot bath or tub, cool if not cold water and a 15min soak will be your best friend. Heck even in a river works. Your feet have done a lot today, this is a big thank you to them and a gentle ask that those tootsies not swell up on you from all that they went through today.
  2. Use your sleep to recover! Take advantage of the time you are of your feet and in bed to further thank your feet and prep them for the next day. A nice massage with some moisturizer before you turn off the night-night light. Put one of your pillows down the bottom of the bed and sleep wth your feet slightly elevated. If you do have swelling, toss on a pair of compression socks too.

Before you step out of bed …

  1. Gently welcome your feet to their next day of hiking! Before you even put a foot out of the bed, stetch those feet, wiggle the tootsies, rub the arch and stretch the toes. I also like to do a few leg, hip flexor and upper body stretches before I even sit up. Nothing like a slow, quiet morning stretch to get you ready for another adventure day. You may also want to do another footsie inspection just to make sure any spots you were watching or treated yesterday are looking good. I keep my blister care items and next day socks beside the bed and update my blister prevention and put on my socks before I even get out of bed to get the day started.

The love you give your footsies and tootsies matters. They can make each step a joy, a chance to look up and around, to be amazed at all you get to see and experience OR they can have you wincing each step counting down to how soon you get to your designation and can make the pain stop.

I know many a hiker that can go a full LDP of 100kms without a single blister – thats the goal!

8 sleeps folks, just 8 short sleeps – England here we come!

Brandé

Coast to Coast – Let’s Pack

We are in the final stretch folks – departure for the Coast to Coast Path in England is a month away (literally!).

The Dad and Daughters crew have been hard at our training in and around each of our respective cities and provinces. At this point, we also need to add a focus on packing to our pre-departure regime. So let’s talk packing list!

A have posted a few blogs on packing that I recommend a read through – some ‘rules’, some ‘tips’ and some specific lists from my last trips. I just did a reread and they are all still super relevant so that makes me happy.

Specifically though for this Coast to Coast Path adventure, I am recommending the below specific list that takes into account the time of year, distances each day, activities other than the hike, and the mixed long distance path experience of the crew.

Let’s get to it…

Upper Half – Hiking

  • 2-3 Tech T-shirts and/or tank tops
  • 1 Tech Long Sleeve
  • 1 Micro fleece or warm layer Long Sleeve or Zip Up (you will wear this on the plane, chilly evenings when not hiking and while on mid-day hiking breaks too)
  • optional Sun Shirt – I love an Eddie Bauer long sleeve button-up UV shirt. I love it as a thin layer in the evening and I love it on the plane. When hiking in the heat, I want very little sun exposure so wear it all day hiking on hot days. This blonde burns fast!

Lower Half – Hiking

  • 2-3 hiking bottoms (I do a short, a capri tight and full length hiking tights. If you have a zip off pant you can count that as a 2 in 1)

Under Bits

  • 3-4 undies (one for the day, a new pair for the night and spare)
  • 2 sports bras (ladies you will wear one of these when not hiking too and need more than one so you can wash them and they often don’t dry overnight. Wee ticks love tucking into sports bras so changing them out for a good wash gets rid of these jerks! And yes there will be ticks. Sorry)
  • Pajamas

Pack all the above in 1-2 compression or stuff sacks! Think of them like drawers that squish.

Outer Hiking Bits

  • Hiking Poles
  • Rain jacket
  • Rain pants
  • Toque – all have an amazing bamboo toque from Wild & Raven we will be showing off this trip. The best!
  • Hat (for sun but also works for rain, especially for the crew wearing prescription glasses)
  • optional 2 Buffs – good for your head, on your arm for sweat and runny nose, a sling, thigh chafe cover, a carry sack, etc!

Pack your rain gear in a compression sack. This will be in your pack everyday – if the weather spirits love us, you will never use it.

Foot Bits

  • Hiking boots or trail shoes – the ones you will wear every day, every km on trail
  • optional runners – if you have room, changing to a light weight runner on long stretches of road walking (or when being a tourist) feels dreamy! Like clouds!
  • Gaiters – soft short pair for every day to avoid bits in your boots, a optional second tall waterproof pair for the Moors and rainy days
  • Sandals – for the evening, your toes will thank you for the fresh air
  • 4 hiking socks (or combo if you use liners) – you will need 2 socks a day so you can switch-out midday.
  • optional Knee length compression socks – but hugely recommended. I wear them on the plane, in the evening and even overnight if my dogs are barking, and in a heat wave while I hike. My feet love to get their ‘swell on’ once in a while, these socks keep em contained and they help with cramps and recovery

In Your Hiking Pack

  • Hiking Pack (20L to max 35L)
  • Rain cover for Pack (might be built in)
  • Water bladder 3L
  • First Aid Kit (see list below)
  • Carabiner
  • Phone (and camera), optional power pack and cords, optional headphones – all in a waterproof ziplock or case
  • Small bug spray with deer (horseflies!)
  • Sun screen for face and body
  • Lip chap with SPF
  • Trail guide and map – not all of us need to carry these but we should have a couple between us for when we split on low and high route options.
  • Kleenex / Toilet paper (and ziplock to pack out)
  • Small hand sanitizer
  • Your lunch and snacks as applicable
  • Candy (mmm Coke Bottles and Sour Soothers are my recommendation!)
  • Wallet and some small cash (for honesty boxes or wee stops that don’t take card)

I like to put ‘like’ items in a little case – sunscreen, lip chap, Kleenex, sanitizer etc so it’s easier to find. I also bring a cute little zippy case for snacks. Over the days you will cumulate a little variety of half eaten cookie and candy packages from the shops – these keeps them and their crumbs contained. This is called the Happy Zippy!

You will find what works for you between the pockets in your backpack. My best recommendation is to put things back where you found them! If your pocket on left hip is for lip chap, sour soothers and hand sanitizer then don’t go putting your lip chap in the right pocket.

Plane, Train, Evening & Tourist

Basically all the activities you will do when not hiking. This is wear a little cotton next to the skin when you have been head to toe in tech gear can feel like a dream!

  • Plane / Train / Tourist light pack that can be squished really small to go into or hooked to your larger backpack when we travel about – I have a Osprey Ultralight Stuff Sack Backpack that can be stuffed into its own pocket that I swear by. No I do not work for Osprey – yes I am available if they want me too 😉
  • Plane / Train / Tourist outfit that you will also wear each night at the pub post hike and shower. Think simple, think small to pack but also comfy and photo worthy. I do a cotton pants tight black and cotton tank. Then use my hiking fleece or sun shirt or tech long sleeve to layer up.

Random Must Have Bits

A brain dump of the extra things I bring along that I feel are essential and are relevant to all the activities you will do.

  • UK plug or adapter
  • Tech charger leads/cords that work with the UK plug or adapter
  • Headphones
  • Light weigh water bottle – think the weight and size of a Smart Water Bottle. You need to stay hydrated so this is your plane, train, evening, tourists ‘always with you’ bottle AND suggest you also take it on the hike each day with some electrolytes. Your bladder is water only.

Toiletries

These are super personal but happy to share my list if it’s helpful. I will say you use less than you think and if visiting a country like England you can buy what you run out of or forget. Finally, everyone is prettier on vacation – relaxed and happy is beautiful – so take less or even more makeup. Don’t stress!

  • Brush or comb
  • Small shampoo (and conditioner)
  • Brush or comb
  • 1/2 bar soap (in a waterproof bag / case)
  • Deodorant*
  • Body cream
  • Face Cream
  • Razor
  • Tweezer (remember ticks!)
  • Prescriptions*
  • Toothbrush, toothpaste and floss*
  • Q-tips
  • Nail clippers
  • Tiny stinky bathroom smell spray
  • Meds Rescue – a little sample of the meds you might need if feeling unwell. I bring a single little blister pack (and take a photo of the instructions) of the following: Pepto, Imodium, Gravol, day Sinus or Allergy, night Sinus or Allergy, a few throat drops, Advil and Tylenol.
  • optional hair spray
  • optional dry shampoo
  • optional hair elastics
  • Minimal make up*
  • Perfume sample*

Anything with a * I bring on the plane with me in the above-mentioned stuff sack backpack – with 20hrs of travel ahead of us, these help me feel human. For sure your prescription meds must be carried on with you!

All of this is packed in a little toiletries bag!

Extra’s I Swear By

  • Sunglasses
  • A few laundry sheets or soap
  • Silk sleep sack – they often only have a comforter in the BnBs and I am a sheet gal so bring my own!
  • An extra, empty compression of stuff sack of about 8L or 10L for your dirty laundry. Keep that stink contained 😉
  • Ziplocks – a couple medium sized one and a bunch of sandwich size for snacks when the bag breaks, wet socks, exploded sunscreen, etc.
  • Electrolytes! Nuun is my go to. I like the ones with caffeinee for a wee boost during my hike and without caffeine in the evening to help recovery. I use that lightweight water bottle mentioned above for my Nuuny-juice!
  • Sleep mask (for the plane and each night. The sun is up at 5am and black out curtains are not a thing in English BnBs)
  • Ear plugs
  • Copy of your passport and your itinerary – and leave a copy of each at home with a loved one!

First Aid in Your Hiking Pack

  • Headlamp or small torch with batteries
  • Emergency blanket
  • Blister treatment – I swear by and only use UK sourced Compeeds but do what works for you! Blister bandaid, Leuko tape, wool, etc.
  • Individual wrapped Alcohol swabs – before you do anything first aid-like swab those hands and the treatment site!
  • Safety pins (a few) or needle and thread – the little travel sewing kits are a dream
  • Bug bite relief
  • Polysporin or equivalent
  • Whistle (may be built into your pack strap, I know Osprey has a whistle strap)
  • Tweezers (from your toiletries bag)
  • Emergency electrolytes or sport beans
  • Bandaids
  • Prescription rescue meds – inhaler, epinephrine, etc. If you have these make sure you fellow hikers know where to find them and when you need them. Put them in an obvious outer pocket on your pack too!
  • Medical tape
  • Tensor bandage
  • Lighter
  • Duct tape – wrap a whole bunch around the lighter instead of trying to being a roll
  • optional Saline Tubes
  • optional Iodine Soaked Pads
  • optional Tegaderm Dressings

The optional items may be better suited to treating blisters and skin abrasion off the trail so you don’t need to carry them in your hiking pack. Also work with the crew you are hiking with to share the load on these items where it makes sense.

Well that’s it – wow that feels like a lot but at almost 2000km of long distance path hiking I feel like it’s a solid list for newbies and a good place to play with for the non-amateurs.

One final MOST SUPER IMPORTANT TIP

Packing tends to be one of the most stressful steps for people. I can see that. It’s not the actual packing – it’s about all the many, many, many micro decisions you have to make that can be exhausting. In a world where we are all sitting on the edge of decision fatigue, packing can break the bank. Try this:

  1. Set aside a place where you can put your to-be-packed items as you collect, buy and decide on them. I literally get dressed for my training hikes from this pile and then put them back when washed.
  2. Hang your packing list up beside it – and in detail as you decide. Do not just list 2 tech tshirts. No! List 1 smartwool red tech tee, 1 grey under armour tee. Decision made, moving on.
  3. Check off the list twice. When you add something to the pile highlight it, when you actually put it in your bag to depart cross it off.
  4. Keep a list of things you decided NOT to take and why (an example from my list: purple tech T-shirt do not pack, it rubs my arms weird on my pack straps). This may sound odd but trust me. In the last days and hours before you depart you will doubt yourself, and start to rethinking that purple shirt – the answer is NO because it rubs my arms weird which I figure out 2 months ago. Leave it home! Stick to the list.

Ok longest blog post with the most bulleted lists goes to this gal. I meet with our Dad and Daughters crew tonight about packing – this blog post is the agenda.

Brande (31 sleeps!)

Coast to Coast – A New Adventure

The next adventure begins …

While the last couple of years have been more local adventures (so a little quiet here on Running for the Gate), that is all changing folks! In just 36 sleeps my bloggy blog friends, I am off to England to walk the Coast to Coast Path.

What is the Coast to Coast Path you ask?

Oh, you are in for a treat on this one – and I hope, as the person walking this sucker, I am too. The Coast to Coast Path is just over 300kms of glorious, rugged England landscape. You literally start the walk with your toes in the West coast (St. Bees) and meander a shot jaunt across the country in a straight-ish line to dip them in the East coast (Robin Hood’s Bay). On the journey, we will walk through 3 National Parks: Lake District, Yorkshire Dales and North York Moors. I think we even dabble just a wee bit in the Pennines National Park as well. It is going to be amazing!

If you are rambler, a fellwalker, a hill walker, a long-distance path walker, a hiker, a thru hiker, a weekend warrior of the hills, adventurer of landscapes, you get where I am going here … you have likely heard of the legend Alfred Wainright. This man is a fellwalking superstar. He walked up and down and around all of the Lake District and more England, all the while creating pictorial guides of his routes for others to give this amazing hobby a go. The Coast to Coast Path is his creation. We will be walking in the steps of ole A.W. for this one and cannot thank him enough for forging the way.

When, Who, Where of the Coast to Coast Path?

Well, this is where excitement about walking this Path and giddiness of the company I will be with combines into the most amazing of combos. This is a father and daughters’ adventure! We are celebrating a 70th (Daddio) and a 50th (my sister Shar, a name you have seen on Running for the Gate many times) with this walk. My sister Hailey (another name you would have seen in the Kilimanjaro hiking blogs) and I tagging along to ensure the right level of shenanigans and tom foolery.

The four of us kick off our adventure in just 36 sleeps. On June 12 we will make our way from Canada to London via plane, London to St Bees via train, St Bees to Robin’s Hood Bay via hiking boot, Robin Hood’s Bay to Londa via bus and plan, then back to Canada in the air for July 3. In there somewhere we will visit Kendal (the birthplace of Wainright himself), walk 16 days and visit York. So excited!

As we make our way to departure and while on our adventure, I will be sure to post highlights here. For videos, check out @runningforthegate on Instagram. I do a little morning ‘this is what our day looks like’ and an evening ‘this is actually what the day felt like’ video and sometimes a few in between. 

For now I will leave you with this most amazing quite from our Path founder …

Oh, how can I put into words the joys of a walk over country such as this; the scenes that delight the eyes, the blessed peace of mind, the sheer exuberance which fills your soul as you tread the firm turf? This is something to be lived, not read about. On these breezy heights, a transformation is wondrously wrought within you. Your thoughts are simple, in tune with your surroundings; the complicated problems you brought with you from the town are smoothed away.” A.W.

Yes to ALL of that A.W. – there is just nothing like walking up and away from it all to free the mind and soar the soul.

Brande aka Doctor Boots

It’s All in the Name – Part I

If you are a long distance hiker, thru hiker, avid hiker, watch hiking movies or shows, read hiking books, etc you may have noticed the concept of a ‘trail name’. Simply put, it is the nick name the trail gifts you. Usually calling out a quirk of your personality, a habit you have, a thing you do, a skill you excel at, how someone would remember you or describe you, or maybe just cause it rhymes with your name.

My crew on the West Highland Way was a mix of amazing ladies I have hiked with before many a time and had already been bestowed with a trail name and a mix of trail name newbies – and of course us seasoned hikers took the time to watch and listen and judge (kindly of course) what trail name the hills of Scotland would magically illuminate for the trail nameless! And then made a big deal one night at the pub of letting them know. As you do!

For this post, let’s recap the trail names already put out by the universe before the trip…

Doctor Boots

That’s me, I am Doctor Boots on the trail. Why? Well I like to call anything I do to adjust a sock, a pole, a boot, add a bandaid or Oreo my ripped bread and torn cheese .. surgery. Elevates the profile of said activity a little, you know?! And I am notoriously in dire straits when it comes to footwear and feet care. Refusing to give up my most fave hiking boots until they were 20 years old and literally leaving bits of rubber behind me on the trail (aka blowing a tire), most usually sporting at least 5 blister bandaids, constantly riddle with small tweaks and rocks in my foot ware (snake in my boot), a foot injury from a a soccer game weeks before leaving on a trip, and at least one toe nail I am encouraging to ‘please stick with me little buddy, just until we finish the trail’, are just a few Boots examples.

Early Bear

Shar, known as Early Bear. Why? Shar is one of those hikers that is so excited to hike the next day that she would leave that night, would live minutes after finished today’s hike, would just not stop at all. She is always suggesting a start time just a little earlier than everyone else – the sooner on the trail the sooner in our happy place! The ‘Bear’ is not grumpy bear it’s happy, bouncy, slightly clumsy, easy to laugh at herself kind of bear vibes! There was a video on Instagram (here) that went around not too long ago where a family filmed a brown bear running to, then leaping onto a kids swing in their backyard – this bear was in heaven, swinging and smiling and cuddling the swing next to him. That is the equivalent vibe of our Early Bear to the trail! No joke!

Commander Butter

Rosa aka Commander Butter. Why? Rosa is on top of all the things! She has her eye on the weather, the trail terrain and elevation, where we are going, what is along the way, and what is at our destination. Reading the books, watching the YouTube videos, monitoring the trail chats and apps. She is super observant, and always has a quiet, loving, gentle watchful eye on how everyone is doing in the troop. Combine this with her smooth hiking skills – they are smooth like butter – and you get Commander Butter. The terrain is the terrain, the rain is the rain, the sunshine is the sunshine, the death defying drop on the cliff side is only another amazing trail feature, she just keeps gliding along .. smooth like butter.

Impossible Turtle

Cheryl is our Impossible Turtle. What seems impossibly hard, confusing, treacherous, torrential, tormenting, or just annoying – does not stop this gal! Impossible Turtle does a reset in her mind, adds a ear bud with tunes, chews a candy for joy, reorganizes a pack pocket, or adds or removes a layer, and she is off and up the hill or over the river or down the mountain, done. Impossible to possible! She is a force! The turtle honors Cheryl’s sometimes slow starts to getting the day going, ending a break, packing up – but don’t wait for her! She will get herself organized in no time, and be on the trail behind you before you know it and btw passing you at mock chicken on the very next down hill. Trust me, I eat a healthy dose of Impossible Turtle dust every hike! Do you remember the hare and the tortoise fable?!

Spicy Hobbit

Niki, aka Spicy Hobbit. Oh goodness spicy may not even be enough spice descriptions for this Hobbit – think 5 alarm ghost pepper and you are on the right track. Niki is our resident quick witted, sarcastic, make you laugh, make you shake your head, ‘that’s what she said’ comedian. Funny as all heck and with enough spice that sometimes you hope the next picnic table didn’t hear! Her spicy sense of humour combined with trouble making tendencies, craving for adventure, and love of food and often (think breakfast and late breakfast and 11-sies and lunch and late lunch and 2-sies) has all kinds of Merry and Pippin hobbit vibes!

Next post, I will introduce you to the trail names we bestowed on the amazing lassies that joined our merry band on this most grand adventure, the West Highland Way.

(oh gosh I talk about a Hobbit in one paragraph and now I can’t stop with the Lord of the Rings vibe! It’s an addiction, sorry. I promise I will get that under control before the It’s All in a Name – Part II)

Brande

Loco Local – 2 Weeks to Go

We are in the 2 weeks-to-departure window now folks!

This close to departure my excitement meter goes way up and, full transparency, I also experience a few moments here and there of anxiousness too. All part of the process I think! It helps to focus on being prepared. So, this last pre-departure stretch will be about packing, confirming travel plans, figuring out why British Airways has changed my seat on a 9hr flight from the one I paid 100 bucks for, and making sure all the things I leave behind are left in order.

Seems I also need this next couple of weeks to pick my lip up off the floor and figure out a little adjustment to my approach to the 400km I have on trail ahead of me … why?

Sadly, frustratingly, madly, grumpily, growly … I am fast and furiously wrapping my head around a new injury. I messed up the PCL in my right knee in a soccer match. Noooo!

Honestly, the knee has been misbehaving for a while now. Ever since I tore the ligaments in my right foot last year (dramatic details here) I have been landing quite differently when I jump. To protect my sore arch, I am landing flat footed which is jarring my knee. I have had some pretty sore days following soccer and volleyball matches. A jumped to head the ball in a soccer match a couple weeks ago and it did me in I guess. When I landed, I felt a rip (not a pop so that’s actually fantastic news) and yikes a good amount of pain. The PCL in my right knee now has my full undivided attention!

What is a PCL you ask?

Posterior Cruciate Ligament (PCL) is a ligament ‘is a band of tissue that crosses inside the centre of the knee joint. It connects your thigh bone to the bone of your lower leg. The PCL keeps your knee stable when it moves forward or backward.’ (thanks HealthLinkBC.ca)

I mean let’s think about this … is knee stability important? Sure. Will I be moving my knee forward and back as I walk 400km? Most of the time. Is it a 6-12 week recovery and I only have 2 weeks before departure? Yes. Am I sad but also mad and pouty as heck? Also yes!

The good news, my PCL is intact it’s only a tear. My knee doesn’t feel too hugely unstable – just not right on inclines and declines and stairs, and a misstep over extends it quite easily. And, also good news, when hiking – unlike soccer and volleyball – I can watch exactly where I put my feet. Heck I won’t be doing anything but watching these dogs for the next month! Also good news, there is a brace on the market specifically for the PCL.

The ‘bad’ news, I had to shell out a bunch for said brace (think the equivalent of my entire spending money budget for the trip in the UK for 30 days – I am gonna need a bake sale before I go so I can refresh my pint budget). More worrisome, I am breaking my most cardinal hiking rule – never ever EVER hike in something you have not trialed at home. Nothing gets packed unless it is tried, tested and true and a BUNCH of times before you depart. Well not this time B – we will adapt on the trial with a smile and as many spontaneous energizing dance parties I might need!

Stay tuned – lots more to come as I wrap my head around this turn of events and a brace a around my rebellious knee. So much to think about but also not over think. I got this! Right? Right! Absolutely!

Brande

PS the injury has also caused a Baker’s Cyst on that same knee (lovingly named jumbo prawn thanks Lana) which I hope just magically goes away and I never have to blog about! A girl can dream …

Loving Local-ish – 4 Weeks to Go

Just wrapped up end of my 4 week countdown of the 2023 Scotland Trifecta and things are getting really, real!

First, let’s get the skinny of what was on the training list since my last post Living La Vida Local – 6 Weeks To Go. As we get closer to departure the training ramps up but in a couple weeks it will also ramp down to ensure I am for ready for and also rested for this 400km challenge.

Here is 5 Weeks To Go training looks like on my tried and tested 20 Week Training Plan:

  • 1x 6km Hills (with 15lb pack)
  • 3x 7km (with 15lb pack and poles)
  • 2x this week let’s get some muscle on:
    • 50 squats
    • 25 lunges
    • 40 calf raises
    • 20 fire hydrants
    • 10 donkey kicks
    • 15 cat/cow
    • 35 double Ds
    • 60 second plank
  • 1x slow flow yoga for flexibility

Last week, at 4 Weeks To Go, there are a couple of subtle differences as this is a ramp it up week:

  • 1x 15km (with 15lb pack and poles)
  • 4x 7km (with 15lb pack, poles optional)
  • 3x this week let’s top up the muscle:
    • 50 squats
    • 25 lunges
    • 40 call raises
    • 30 fire hydrants
    • 10 donkey kicks
    • 15 cat / cow
    • 40 double Ds
    • 60 sec plank
  • 1x flexibility session (stretching, yoga)

Of course, for each hike there should be some gentle stretching as your warm up, and some post hiking stretching too. And to be clear that means more stretching than just the reaching my arm across the bar for a cold pint – add in a calf stretch with your toes on the leg of the bar stool while you do it for extra pints .. I mean points!

My bestie was visiting a couple weekends ago and we had to chance to get in a few of my training sessions with local walks or hikes on a little weekend adventure to Vancouver Island .. hence the local-ISH.

Westsong Walkway

The Westsong Walkway is fantastic, flat and easy walk along the Victoria inner harbor!

A mix of paved path, some boardwalk and a few rock trails that gives you fantastic views of the water, float planes landing and taking off and, if you plan it right even offers a chance to quench your thirst at a fantastic local watering hole, Spinnakers.

We walked about 5km. You can add some additional kilometers if you walk from Johnson Street to Esquimalt and back around the harbour over to Fisherman’s Wharf. Basically, it’s beautiful Victoria and walking all the places is just a total joy!

Thetis Lake

We also had the chance to hit one of my favourite hikes from when I lived in Victoria – Thetis Lake! Instead of the regular (busy but beautiful) lower and upper Thetis lake trails we did some meandering on Phelps Trail, Trillium Trail and more on the outskirts of the park. We were able to cobble together about 12km. It’s been a while since I have been to Thetis and I am still amazed at just how beautiful a hike surrounded by city can be!

Pre-hike energy loading may have been a most fabulous, delicious, amazing Pork Belly Eggs Benedict from Six Mile Pub and post-hike celebration may have been a refreshing flight .. or two … from Herald Street Brewing in Victoria. All the yumminess! This day was pretty close to the daily activities I will be experiencing over in Scotland. In Alba, the day will start with a Full Scottish Breakfast transition into a hike then transition into pints. They do say your training at home should be as close to the real deal abroad! I am just following great advice 😉

Juan de Fuca Trail, Mystic Beach

Completing the entire Juan de Fuca Trail is on my to-do list but not on this trip. This trip was more around getting some kilometers on the training dashboard and ensuring my bestie from land locked Alberta got some max ocean views in! Hello Mystic Beach.

After a great drive from Victoria to Shirley, BC and a stop for breaky at Shirley Delicious (which was most surely delicious) …

… and a quick waltz down to the Sheringham Point Lighthouse, which was so picturesque and barely a soul around …

… headed to the China Beach trailhead / parking lot and walked the well marked 2km trail down to Mystic Beach. This short trail had all the things we love – suspension bridge (Lana loves those not me), boardwalks, bridges, some up and some down, and enough people to keep the bears away! We saw a bear on the road just before starting our hike so we may or may not have been on high alert!

We spent a good amount of time down at the beach just taking it all in. The sound of the waves, hot sun and views you cannot even believe are in front of you makes it easy to stay a while.

Once we tore ourselves away from the view, and humped the 2km back to the car – where we may or may not have discovered just how bad my misbehaving knee / leg / foot / is feeling (more on that later) – we made our way back to Victoria. Well, not before a quick post hike refresh at Sooke Brewing Company! Yum!

Back in Victoria, we parked the car and accidentally headed to a couple more local breweries. You sensing a theme here? Including Whistle Buoy Brewing in Market Square – so delicious! That pretty blue one on the end was a perfectly sour Gose to cleans the flight-pallet!

That’s a wrap on our weekend all about training and filled to the brim with pints and laughs and more laughs!

Stay tuned for Week 3 and 2 To Go training updates – we are in the the final stretch to departure now folks!

Brande

Living La Vida Local – 6 Weeks To Go

Officially in the 6 week countdown window to my next adventure in Scotland! On this visit to majestic Alba, I will be meandering Speyside Way, West Highland Way (for a second time) and East Highland Way. A little 395km walk from a full Scottish Breakfast in the morning to my next Haggis Neeps and Tatties dinner with a pint in the evening. Nae bother!

6 weeks out means the training is getting good and fun and tough! We are experiencing crazy warm temps right now (30C) so a bit challenging too! As far as I am concerned, some training that hurts the body at home = happy body and mind in the Highlands! Here is what Week 6 training looks like on my go-to 20 Week Training Plan:

  • 2x 6km hike w hills
  • 2x 7km hike
  • All hikes with 10lb pack, poles optional
  • Also some strength training, 2x each of the following at some point this week:
    • 50 squats
    • 40 lunges / leg
    • 40 calf raises
    • 20 fire hydrants
    • 15 cat/cow
    • 30 Double’s
    • 60 second elbow plank

Getting these training hikes in is such a great way to discover new places in the Greater Vancouver area to hike! A few new ones that have been added to my ‘done like dinner’ list (yes it is literally called that on my All Trails account):

Shoreline Trail at Rocky Point, Port Moody

A scenic, easy walking trail. Mix of gravel and paved path, loads of people, a touch of incline/decline with loads of amazing scenery! The path wraps around Burrard Inlet and a workout can be rewarded with 1 of many breweries right there at the start/finish at The Port Moody Ale Trail.

While I didn’t get a chance to hit the brewery (we walked early to beat the heat) I was rewarded with a 7km fantastic conversation with my local hiking / training bestie Amber! Next time a post walk pint is definitely in order for these gals!

Eagle Bluffs via Coquitlam Crunch, Coquitlam

A moderate hike that will have the thighs and buns burning! The Crunch is a lovely 500 stair torture device made worse by the ‘You Can Do This!’, ‘Almost There’, and ‘Pace Yourself’ signs that pepper the ascent. Can I do this? Am I almost there? By ‘pace yourself’ do you mean stop now and go grab a coffee and read a book? Likely not, so up and up and up I went.

After defeating the evil stair master, I meandered up and up and around the local neighborhood for a bit to eventually hit the, mostly uphill, trail to the Eagle Bluffs.

The trail is an old gravel access road and if you can ignore the power lines that run above much of this trail, it is still quite a nice hike – and sure a great workout with enough forest time to make me smile!

All in all it’s about 13km from the bottom of the Crunch up to the Eagle Bluffs first look out and back, and about 550m elevation! At my acceptable pace of just slightly speedier than turtle, I clocked it in at 3hours. That includes a sunny snack break on a rock at the top, of course.

This is a hike I will be using to gauge my training progress, not so much about getting faster more around if it gets easier. I did it a couple weeks ago with my bestie Bean and felt the burn, did it again this weekend and felt more like a smolder. Progress!

Sidewinder and Pipeline Loop, Burnaby Mountain, Burnaby

Loving all the things Burnaby Mountain lol right now – lots of trail to choose from, 20mins from work, 40mins from home, well trafficked, so green and great views!

The Sidewinder and Pipeline Loop are connected by Function Junction and Meil’s Trail making for a great work out. Lots of switch backs, good and long incline sections, and even a few sketchy sections that are good for my managing my ‘fear of heights’. I didn’t really need my fear of bears to be exercised though but it is a mountain in all.

This is another trail that I will be using to gauge my training progress. Less breaks on the incline switch backs, higher pace, and faster recovery – all signs the training is working. Especially if this happens as I increase the weight in my pack and how many times I do the loop.

I had the chance to hit up this trail a couple times last week. Once after work on Wednesday (amazing!) and again on Sunday morning (saw a bear, less amazing). The 1.5hr time on this 6.5km trail with 250 elevation gain is a perfect quick one or even to do a couple times in a row.

Ok off the plan the rest of my training hikes for the week. It’s a a long weekend this week – so maybe I can even get in a long one!

Brande

Embrace the Over Think

To all you over thinkers out there, can I get a hey-0! I see you! I feel you! I am you! I have taken over thinking to the next level when it comes to trip prep, planning and packing. And I am here to tell you sometimes, believe it or not, over thinking can actually be an adventurer’s super power!

Give me a beat to explain …

Overthink Your Toiletries

We all wonder if we will have enough shampoo, soap, deodorant, bug spray, all the things when we head out on an trip. You don’t want to bring too much and add extra weight (these are some of our heaviest items) or take up more room than necessary BUT you also don’t want to take too little and be in a lurch having to scramble to find what you need in another country. Where you might be lucky if you can find the brand you prefer or even what you need. If helpful, insert a mental image of me spending way too long looking for Tylenol in a Pharmacy in Wales passing shelves of Paracetamol over and over and over as I searched. BTW Paracetamol in the UK is what we call Tylenol in Canada. Thank you Google!

To avoid spending more mental energy than necessary worrying if I am packing too much or too little for toiletries, I do a little scientific overthinking! Ok more of a simple experiment or trial but saying it’s science sounds so much cooler. Basically, I pack to stay home!

Ahead of your trip (aka WEEKS before you leave) fill those Goo bottles or travel containers or whatever you bought for travelling as if you are packing to leave right away. But, instead of just putting them in your backpack or suitcase, use them as if you are on your trip. As you use them, count how many days each thing lasts and compare it to the number of days you will be away on your trip. Then asses how that went! Did you have enough? Too much? Was the travel container you used totally annoying or did the lid break on first use? Then adjust accordingly for you actual trip!

I take this too far of course and literally have a little page in my journal to jot down for how long a razor lasts, how many shampoo washes, how many lathers my soap got me, how many brushes my toothpaste made happen, etc. So I can go total ‘science’ on my assessment and even have a little legend of my learning over a lot of past trips so I pack smarter each time.

If a trip is only a few weeks, I will pack all I need usually. Longer than that and I worry less about packing exactly the right amount of things I think I can find abroad and am not too picky about – this will save some room and weight. I.e if you are picky about your shampoo, but less so about your body soap – bring enough shampoo but a half bar of soap. I am very picky about my mascara less so about my chapstick – so bring the right size of mascara and only a few chapsticks.

A couple of tricks if you are running low on the basic toiletries while abroad:

  • Outside of the US and Canada, pharmacies tend to have the best selection of basic toiletries like Tylenol, face cream, body cream while grocery stores have shampoo, etc.
  • Keep your smaller travel containers after they are empty until you replace that item. It’s not easy to find travel size toiletries in some places, you may need to decant that shampoo you found at your destination into your travel container so it fits in your pack.
  • Check your accommodation for an honesty box or trail magic box for items people may have left behind. Often a hotel bathroom or pool area for shampoo, conditioner, body cream .. fill up your travel container!
  • If you are travelling with someone who has a preference for the same product as you – go in together on a full bottle. One carrying the shampoo and the other the conditioner to spread the love.
  • Figure out what 2-in-1 products work for you and only worry about one product and container instead of 2! I have a sunscreen moisturizer for my face that saves me carrying both. 2-in-1 shampoo and conditioner is another good one.

Overthink Your Wardrobe

You might be surprised to hear me say I recommend you take the same approach to the clothes you intend to pack. Yup, more science!

Once again, literally pack your clothes for your trip – from undies to shirts, pants to socks – pack like you are leaving tomorrow. Then over the course of the next few weeks and months at home wear what you packed and evaluate. If you are going on a tourist holiday, wear your outfits around town, running errands, meeting friends, long car rides, etc. If you are going on a hiking adventure, wear your outfits on your training hikes.

Evaluate each individual piece of clothing AND each complete outfit against the below trust-me-you-will-not-regret-this criteria. Oh and please kick this experiment up a notch by making sure you get some photos of you in each outfit – cause on your travels guess what you will be taking a lot of?! Photos!

  • Did it feel uncomfortable, ride up, fall down, bunch up, slide down, itch or scratch? If yes, ditch it!
  • Did you adjust the clothing item often? Pull on it when you stood up every time? Stretched it out before you put it on? Kept pulling up the straps, folding the sleeve, twisting the ties? If yes, ditch it!
  • Did it make me feel ugly, feel bla, all ick, too big, too small, too one colour, too many colours, too bright, too dull? If yes, ditch it!
  • Did you choose not to trial that one article of clothing or that outfit because it’s just so special and you only want to wear it on the actual trip? If yes, ditch it! For real! Ditch it! Ditch it! Unless it’s a bloody wedding dress, if you will not wear it at home trust me you will not wear it abroad. Ditch it!
  • Did you look at the selfies and photos of you in that shirt, pants, shorts, hat, jacket and delete or sneer or gasp or some other form of not-so-kind-to-myself response? If yes, ditch it! (you have my encouragement to ditch the article item forever to second hand AND delete the photos too)

Ok so you have thought about each article of clothing individually, now I need you to think about outfits. I am about to suggest something that may be cringe worthy to the fashionistas out where, but trust me … trust me!

If you cannot wear every top with every bottom you bring .. wait for it … IT DOES NOT GET TO COME ON THE TRIP! If that shirt you love only matches one pair of the 3 bottoms you are bringing, bye bye shirt! That skirt and tank only look good together and with nothing else you are packing, bye bye skirt and tank!

This is when you need to channel your brutal side folks. Over thinking to the extreme! Embrace it! You literally wear every, single combo of every single top and bottom you are packing and if even one shirt does not behave with all bottoms OR or you answer yes to any of the criteria above – that is a HARD NO! Ditch that article of clothing, no trip for it!

The process of elimination can take a few weeks but trust me – you and your pack will feel lighter for it! You will thank yourself!

This idea of overthinking is also totally applicable to trip planning check out My Planning Process. All you do before you leave on your trip will make the trip all the better and all the more real!

Brande

Beyond the Bonk

Excited to share a guest post by one of my hiking besties, Cheryl aka Impossible Turtle …

We’ve all been there: You’re partway through your day on the trail and you find yourself checking your watch (or phone or AllTrails or Ken – aka Cairn) to see how many kilometres you have left. And it never seems like the “right” number. Then it slowly hits you, that realization that no one wants on a hike: You fell out of love with this sh*t five or six km back.

Dammit. This, my friends, is the wall. The bonk. The “why am I even out here” moment. And it sucks.

But let’s not mistake it for more than it is. It happens to everyone at some point. It doesn’t mean you don’t still love hiking or long distance walking, it just means you need a different game plan for this hike and this day of walking. That’s it. And believe me when I say you can spend five or six or ten kms trying to talk yourself out of it and find your trail joy again or you can embrace the suck, acknowledge where you are (in all the ways – literally, metaphorically, emotionally, physically), see it as temporary and get sh*t done.

Before I delve into the ways I battle the bonk, I should mention there are plenty of perfectly logical, sensible ways to prevent bonking.

Here are a few:

  • Get adequate sleep the night before your hike
  • Drink (and bring) plenty of water, some with added electrolytes if it’s hot or you’re a sweaty mess like me
  • Eat a good, but familiar breakfast. Think something filling that will hold you til elevenses but not something heavy or bothersome for your guts.
  • Bring plenty of snacks. (Protein like beef jerky or pepperoni is a go to for me. Salty is good. Candy is also good, but we’ll get to that in a minute.)
  • Relax. This is the hardest one, I know. But if you can stay in the moment and keep your head on the trail (not at home with your daily stresses), you’ve got a better chance of feeling the pre-bonk feelings and saving yourself some grief.

Now, let’s say you (*cough*me*cough*) did all of these things to the best of your ability, given the circumstances and still, you’re feeling. It. All.

Muscle pain. Fatigue. Joint pain. Heat. Anxiety. Guilt.

It’s all beating down on you like the 28 degree sun but there’s no cream that blocks that junk out. You feel like you hit your limit.

(Side note: I’m willing to bet you’ve never actually hit this limit. I’ve let the negative part of my brain convince me I’ve been at that edge many times, on many trails. But it’s lied to me every time. There’s a way to finish. I promise.)

So what do you do? What did I do? I got angry with myself. That sounded a little like this: “You’re in the Cotswolds, for god’s sake! C’mon, Ashworth, you’re in England, in area of outstanding natural beauty, how dare you not love this? Do you know what your family had to do to make this work?” Uhm, that’s not exactly a motivational speech, friends. That kind of self talk doesn’t make the 10 or 15 kms left feel breezy. 😉 But I had to have that moment to hear the ridiculousness of it and then I had to say it out loud to mg trail buddies to hear it sound even more ludicrous. And then it was out of my system. I’ve admitted it. This afternoon, this moment in time on this small section of the Cotswold Way is not my friend. I admitted that, I owned it and I tried to let it be. I couldn’t change it. I loved the day before and would probably love the day to followed. Not loving this bit right here and right now doesn’t define my walk.

So now what?

Candy. I wish I was kidding. Moments like this are what Skittles were made for, my friends. A little glycogen for the muscles, a little sugar straight to the brain brings back some semblance of motivation. I discovered Skittles without the shell in the UK and they saved me several times. Despite condensing themselves into one giant candy clump in the heat, I could always rely on these for a sweet little kick in the butt.

My second saviour will seem like a real trail rule breaker to some and that’s fine! I get it. But music motivates me like nothing else. When you really, truly need something to push you forwards, I know you have a go to song. For Wales & Cots, mine was Free by Florence and the Machine. I don’t often have headphones in my pack, but I did throw them in for the last few days on the trail. (Persistent muscle troubles and some joint pain will have you reevaluating and carrying bits & bobs you otherwise might skip.) I always have my phone, for maps and for emergencies, so at least once, on my really down day, I pulled out my headphones and set Florence to repeat. I think Shar relied on some Motley Crüe one day – whatever floats your boat or moves your feet!

Above all, the biggest thing to remember is the cheesiest platitude I have for you: This too shall pass. It will. It does. And when it happens next time, you’ll know it won’t beat you. It never has. The bonk never wins.

As long as your feet are still in your boots, you can bust through any bonk.

Cheryl